Quick Recipe Version (TL;DR)
Quick Ingredients
- 1 kg pork fatback, skin on, in a thick slab (about 2.2 lb)
- 30 g kosher salt (3% of fatback weight)
- 2.5 g curing salt #2 (0.25% of fatback weight, optional but recommended)
- 5 g sugar (about 1 tsp)
- 8 g whole black peppercorns, crushed (about 1 tbsp)
- 6 g juniper berries, lightly crushed (about 2 tsp)
- 2 tbsp chopped fresh rosemary (or 2 tsp dried)
- 3 garlic cloves, lightly crushed
- 3 bay leaves, crumbled
Do This
- 1. Trim the pork fatback into a neat, thick slab and pat completely dry. Weigh it so you can calculate the salt and curing salt by percentage.
- 2. Mix kosher salt, curing salt #2 (if using), sugar, crushed peppercorns, juniper, rosemary, garlic, and bay in a bowl.
- 3. Rub the cure mixture all over the fatback, pressing it into every surface. Place in a non-reactive container just big enough to hold it snugly.
- 4. Cover and refrigerate at 2–4°C / 35–39°F for 10–14 days, turning the slab every 2–3 days and basting with the briny juices.
- 5. When the slab feels firmer and has lost some springiness, rinse off the cure under cold water and pat very dry.
- 6. Wrap tightly in cheesecloth or parchment, then in plastic wrap, and refrigerate another 2–4 weeks to mellow and develop flavor.
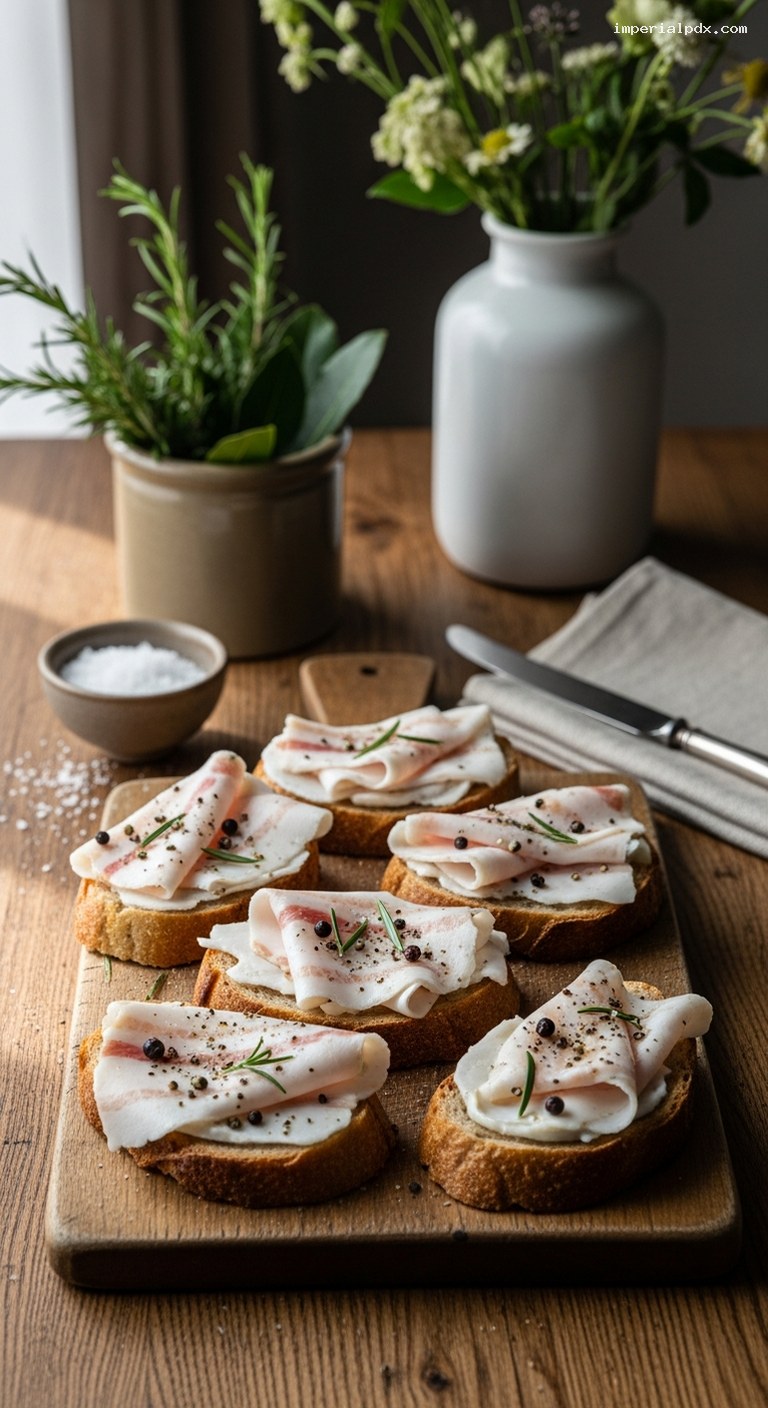
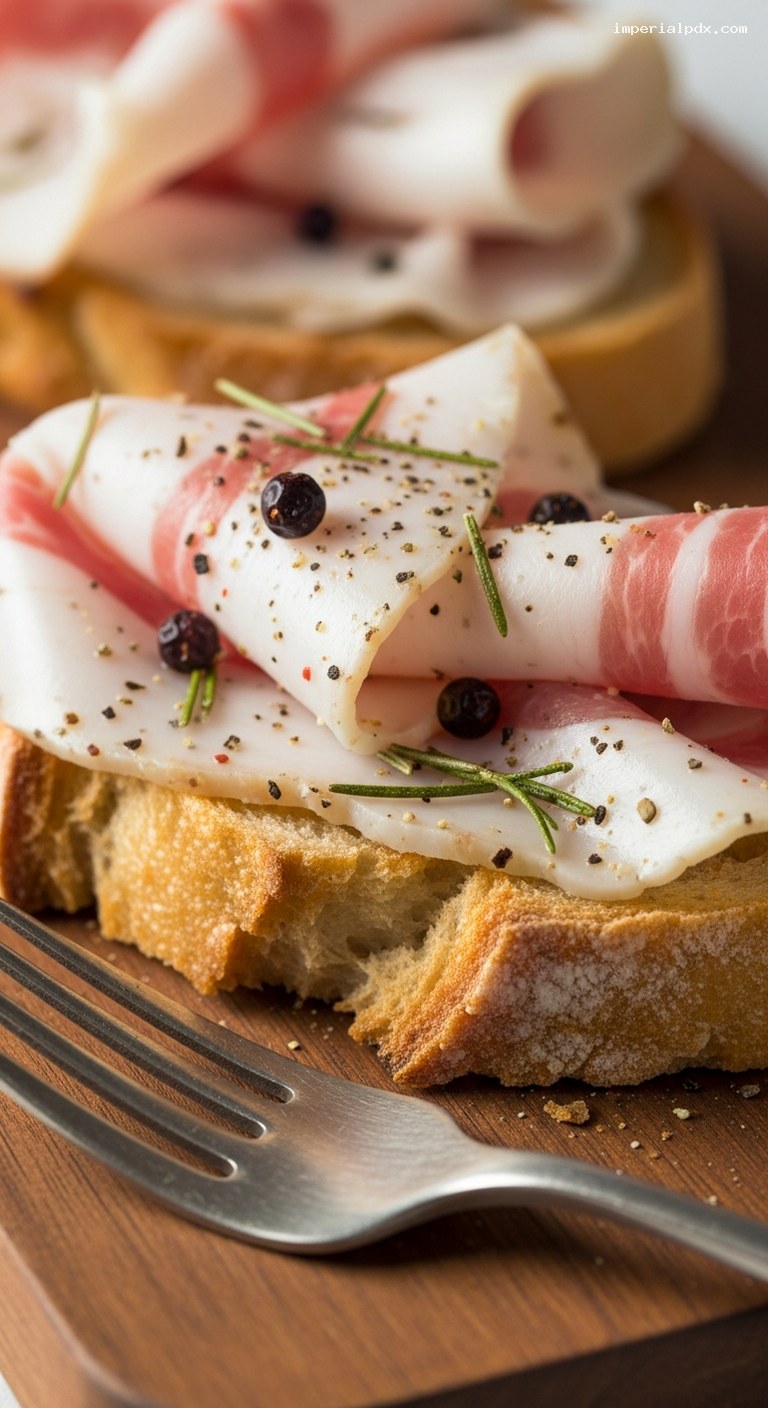
- 7. To serve, chill well, slice paper-thin, and lay on warm crusty bread, roasted vegetables, or grilled meats so it gently melts.
Why You’ll Love This Recipe
- Turns a humble cut (pork fatback) into a luxurious, silky delicacy with minimal hands-on time.
- Deep, aromatic flavors from rosemary, juniper, garlic, and black pepper that feel restaurant-level but are easy to achieve at home.
- Keeps for weeks in the fridge, ready to shave over bread, vegetables, polenta, or grilled meats whenever you like.
- Perfect “project recipe” if you enjoy slow, traditional techniques like curing and charcuterie.
Grocery List
- Produce: Fresh rosemary, garlic, (optional) fresh thyme or sage
- Dairy: None
- Pantry: Pork fatback (ask your butcher), kosher salt, curing salt #2 (optional but recommended), sugar, whole black peppercorns, juniper berries, bay leaves, (optional) crushed red pepper flakes
Full Ingredients
Core Lardo Cure (for 1 kg / 2.2 lb pork fatback)
- 1 kg pork fatback, skin on, in 1–2 thick slabs (about 5–7 cm / 2–3 inches thick)
- 30 g kosher salt (3% of fatback weight; about 2 tbsp, but weigh for accuracy)
- 2.5 g curing salt #2 (0.25% of fatback weight; about 1/2 tsp) – optional but recommended for longer cures and safety
- 5 g white sugar (about 1 tsp)
- 8 g whole black peppercorns, lightly crushed (about 1 tbsp)
- 6 g juniper berries, lightly crushed (about 2 tsp)
- 2 tbsp finely chopped fresh rosemary leaves (or 2 tsp dried rosemary)
- 3 medium garlic cloves, lightly crushed with the side of a knife
- 3 bay leaves, crumbled
- Optional: 1/2 tsp crushed red pepper flakes for a gentle heat
Equipment
- Digital kitchen scale (for accurate salt percentages)
- Non-reactive container just big enough for the fatback (glass, ceramic, or food-safe plastic)
- Plastic wrap or a tight-fitting lid for the container
- Cheesecloth or parchment paper for wrapping
- Sharp slicing knife or meat slicer for very thin slices
Step-by-Step Instructions
Step 1: Source and prepare the pork fatback
Ask your butcher for firm, white pork fatback from a healthy animal, ideally skin-on and cut into a thick, even slab about 5–7 cm (2–3 inches) thick. Avoid fat that looks yellow or has a strong odor. At home, unwrap the fatback and pat it completely dry with paper towels.
Trim away any stray bits of meat or ragged edges so you have a tidy slab. Keep the skin on; it helps hold the fat together and makes slicing easier later. Weigh the trimmed fatback in grams and write the number down. You will use this weight to calculate the salt and curing salt percentages if your piece is larger or smaller than 1 kg.
Step 2: Mix the aromatic cure
In a small bowl, combine the kosher salt, curing salt #2 (if using), and sugar. Stir to blend. Using a mortar and pestle or the bottom of a pan, lightly crush the black peppercorns and juniper berries to crack them open but not powder them. Add them to the bowl.
Finely chop the rosemary leaves and crumble the bay leaves between your fingers. Add rosemary, bay, garlic cloves, and optional crushed red pepper flakes to the cure mixture. Mix everything thoroughly so the flavors are evenly distributed. The cure should be fragrant with rosemary, pepper, and juniper.
Step 3: Rub and pack the fatback with cure
Place the fatback in your clean, non-reactive container. Sprinkle some of the cure mixture on the bottom of the container to create a thin bed. Rub the remaining cure all over the fatback: top, bottom, and all sides. Press the garlic cloves and herb bits directly against the fat so they make good contact.
Arrange the fatback so it fits snugly in the container; snug packing reduces air pockets and helps the cure work evenly. Scrape any remaining cure from the bowl over the top. Cover tightly with plastic wrap or a lid, making sure the fat is as covered as possible with the cure mixture.
Step 4: Cure in the refrigerator (first phase)
Place the covered container in the coldest part of your refrigerator, ideally at 2–4°C / 35–39°F. This low temperature is important for food safety. Over the next 10–14 days, the salt will draw out moisture, creating a briny liquid, and will slowly penetrate the fat.
Every 2–3 days, remove the container, unwrap, and carefully turn the slab of fatback over. Spoon or baste some of the briny liquid over the surface to re-coat it. Re-cover and return to the fridge. As the days pass, the slab will feel firmer and slightly denser; this is a sign the cure is working. For a 1 kg slab, 10–12 days is usually enough; very thick pieces may benefit from up to 14 days.
Step 5: Rinse, dry, and wrap for aging
When the fatback feels noticeably firmer and a bit less springy to the touch, it is ready for the next stage. Remove it from the brine, discarding the liquid and aromatics. Rinse the slab briefly under cold running water to remove excess surface salt and herbs.
Pat the fatback very thoroughly dry with clean towels; surface dryness helps it age cleanly. Wrap the slab in a double layer of cheesecloth or parchment paper, then wrap again in plastic wrap or place in a clean food-safe bag. The inner layer lets the fat breathe a little while the outer layer helps protect it from drying out too fast or picking up fridge odors.
Step 6: Age to develop flavor and texture
Return the wrapped fatback to the refrigerator (still at 2–4°C / 35–39°F) for an additional 2–4 weeks. This aging period lets the salt equalize through the fat and the flavors from rosemary, juniper, and pepper mellow and deepen. The texture will become silky and sliceable, rather than crumbly or greasy.
During this time, you can check it once a week: unwrap the outer plastic, inspect the cheesecloth or parchment, and make sure there are no off smells or unusual colors. A clean, slightly garlicky, herby aroma is what you want. Rewrap and continue aging. Longer aging (up to 6 weeks total) gives a more pronounced, traditional lardo character.
Step 7: Slice and serve
For the best, most translucent slices, chill the lardo well before cutting; you can even pop it in the freezer for 10–15 minutes to firm the fat slightly. Using a very sharp knife (or a meat slicer, if you have one), slice the lardo across the grain into paper-thin sheets. The skin will be firm, so you may prefer to cut the skin off first or simply avoid eating it and use it to help with slicing.
Serve the lardo in very thin slices laid over warm, toasted country bread, creamy polenta, roasted potatoes, grilled asparagus, or simply on a wooden board alongside olives and pickles. The gentle heat of the food or bread should just begin to melt the fat, turning it silky and almost translucent. A sprinkle of freshly ground black pepper or a few rosemary needles on top makes a beautiful finish.
Pro Tips
- Measure by weight, not volume: Curing is safest and most reliable when you weigh both the meat and the salt. Adjust the salt and curing salt percentages to your exact fatback weight.
- Keep it cold: Maintain fridge temperature between 2–4°C / 35–39°F throughout curing and aging. Do not cure at room temperature.
- Start mild on herbs: Rosemary and juniper are powerful. You can always add more aromatics next batch; too much can overpower the delicate pork flavor.
- Slice very thin: Lardo should almost melt on your tongue. If you can see the light through the slice, you are doing it right.
- Trust your senses: If at any point you notice off smells, sliminess, or unusual colors (green, black, fuzzy growth), discard the batch.
Variations
- Herb garden lardo: Add a mix of chopped fresh thyme, sage, and marjoram along with the rosemary for a more complex, Tuscan-style flavor.
- Spicy lardo: Increase the crushed red pepper flakes to 1–1½ tsp and add 1 tsp smoked paprika to the cure for a gentle heat and smoky aroma.
- Wine-kissed lardo: Before curing, briefly marinate the fatback in 120 ml (1/2 cup) dry white wine for 30 minutes, then pat dry and proceed with the cure for a subtle wine perfume.
Storage & Make-Ahead
Lardo is almost entirely make-ahead: the entire recipe is about curing and aging. Once fully cured and aged, keep the lardo tightly wrapped in parchment or cheesecloth and then plastic wrap, or in a sealed container, in the refrigerator. Properly stored, it keeps for at least 4–6 weeks, often longer, with quality gradually changing over time.
For longer storage, you may freeze tightly wrapped lardo for up to 3 months. Thaw slowly in the refrigerator before slicing. Always use a clean knife when cutting, and rewrap well afterward to protect from air and odors. Serve lardo in small quantities at a time; it is rich and best enjoyed as a garnish rather than a main component.
Nutrition (per serving)
Approximate values for a 15 g serving (a few very thin slices): about 135 calories; 15 g fat; 5 g saturated fat; 0 g carbohydrates; 0 g fiber; 0 g sugars; 0–1 g protein; high in sodium due to the cure. This is an indulgent ingredient meant to be used sparingly as a flavorful accent.