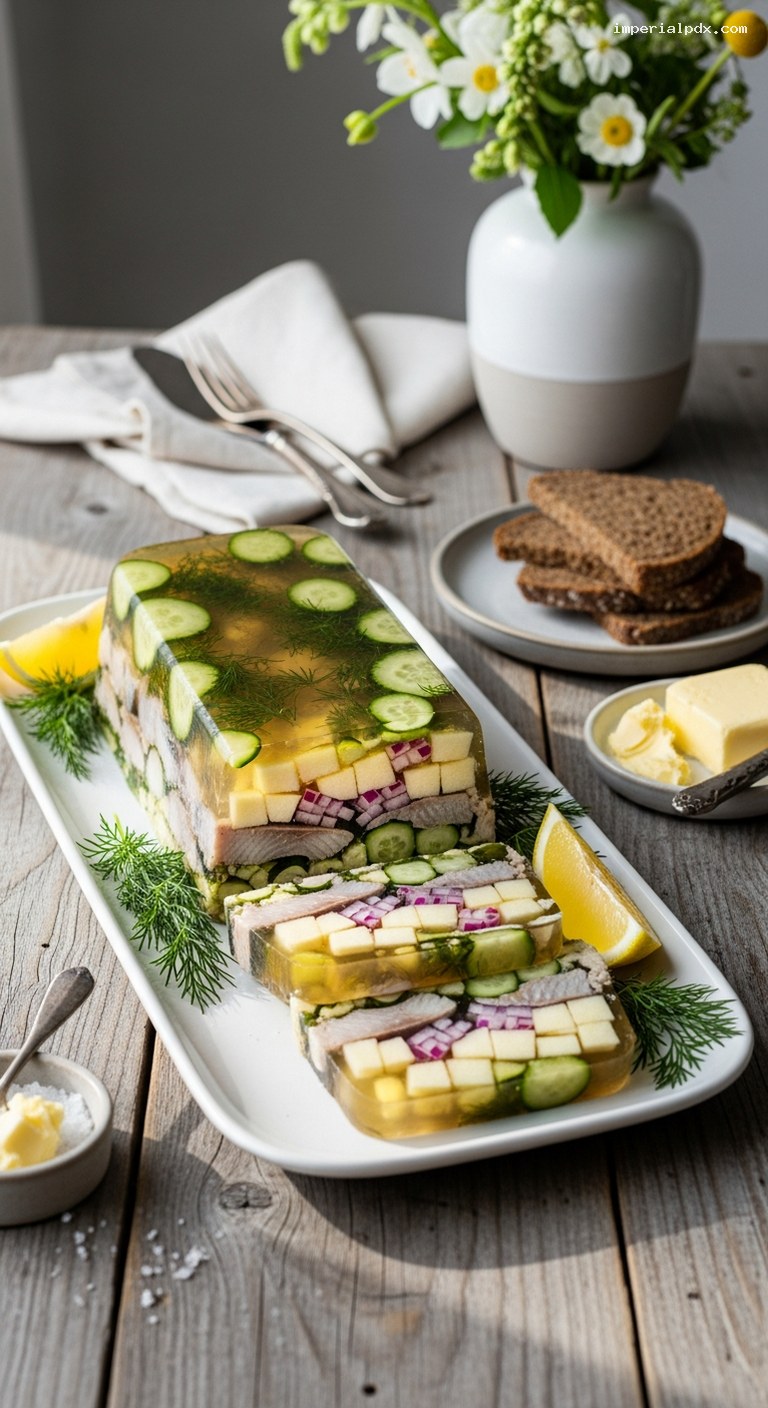
Pickled Herring Terrine (Scandinavian-Style Cold Cut)
Quick Recipe Version (TL;DR)
Quick Ingredients
- 2 jars (about 250 g each) pickled herring fillets in brine, plus 1 1/4 cups (300 ml) brine reserved
- 1 large tart apple (e.g., Granny Smith), finely diced
- 1 small red onion, finely diced
- 1/2 small cucumber (optional), finely diced
- 1/2 cup (loosely packed) fresh dill, chopped
- 1 1/2 Tbsp (about 13–15 g) unflavored powdered gelatin
- 1 cup (240 ml) cold water
- 3/4 cup (180 ml) dry white wine or apple juice
- 1 Tbsp sugar (or to taste)
- 2 Tbsp lemon juice
- Salt and freshly ground white or black pepper, to taste
Do This
- 1. Line a 1 L / 1-qt loaf pan with plastic wrap, leaving plenty of overhang.
- 2. Drain herring, reserving 1 1/4 cups brine. Cut fillets into bite-size pieces. Dice apple, onion, and cucumber; toss with lemon juice and dill.
- 3. Sprinkle gelatin over 1/2 cup cold water in a small bowl; let bloom 5–10 minutes.
- 4. In a saucepan, combine reserved brine, remaining 1/2 cup water, wine or juice, and sugar. Warm gently (do not boil), then whisk in bloomed gelatin until fully dissolved. Cool to room temperature.
- 5. Spoon a thin layer of cooled gelatin into loaf pan; chill 10 minutes to lightly thicken.
- 6. Layer herring and apple-onion mixture in the pan, spooning gelatin between layers. Gently tap pan to remove air bubbles, then pour over remaining gelatin to cover.
- 7. Cover and chill at least 6 hours or overnight until very firm. Unmold, slice with a sharp knife, and serve well chilled with rye bread, potatoes, or crispbread.
Why You’ll Love This Recipe
- Classic Scandinavian flavors of pickled herring, apple, onion, and dill in an elegant, sliceable form.
- Make-ahead friendly: prepares entirely in advance and keeps beautifully in the fridge for days.
- Light yet satisfying: a gently set, not-bouncy gelatin that feels delicate but slices cleanly.
- Perfect for buffets, holidays, smørgåsbord spreads, or a stylish brunch starter.
Grocery List
- Produce: 1 large tart apple, 1 small red onion, 1/2 small cucumber (optional), 1 lemon, fresh dill.
- Dairy: None needed (serve with butter or crème fraîche if you like).
- Pantry: 2 jars pickled herring fillets in brine, unflavored powdered gelatin, sugar, dry white wine or apple juice, salt, pepper.
Full Ingredients
For the Terrine
- 2 jars pickled herring fillets in wine/vinegar brine (about 250 g each, including brine)
- 1 1/4 cups (300 ml) herring brine, reserved from the jars
- 1 large tart apple (e.g., Granny Smith), peeled if you like, finely diced (about 1 cup)
- 1 small red onion, finely diced (about 1/2 cup)
- 1/2 small cucumber, seeded and finely diced (about 1/2 cup, optional but nice for freshness)
- 1/2 cup fresh dill fronds, loosely packed then finely chopped (plus extra sprigs for garnish)
- 2 Tbsp fresh lemon juice
- Salt and freshly ground white or black pepper, to taste
For the Mild Gelatin Base
- 1 1/2 Tbsp (about 13–15 g) unflavored powdered gelatin
- 1 cup (240 ml) cold water, divided
- 3/4 cup (180 ml) dry white wine or unsweetened apple juice
- 1 Tbsp sugar, or more to taste (depending on sweetness of the brine)
To Serve (Optional but Recommended)
- Dark rye bread, crispbread, or boiled new potatoes
- Soft butter or crème fraîche
- Lemon wedges
- Extra chopped dill or chives
Step-by-Step Instructions
Step 1: Prepare the pan and gather ingredients
Line a 1-liter (about 1-quart) loaf pan with plastic wrap, letting plenty hang over the long sides so you can lift the terrine out later. Smooth the wrap as much as you can, pressing it into the corners; a few small wrinkles are fine.
Set out all ingredients: jars of pickled herring, apple, onion, cucumber (if using), dill, lemon, gelatin, sugar, water, and wine or apple juice. This recipe moves more smoothly if everything is prepped and within reach before you start on the gelatin.
Step 2: Prepare the herring and vegetables
Open the jars of herring over a bowl and pour all their contents (fish plus brine) into a sieve set over the bowl. Let the fillets drain while you work, then measure out 1 1/4 cups (300 ml) of the brine and set it aside for the gelatin base. If you do not have enough, top up with a little water and 1–2 teaspoons white wine vinegar.
Pat the drained herring gently with paper towels. Cut the fillets into bite-sized pieces, about 2–3 cm each (1 inch). Set aside in the refrigerator.
Finely dice the apple, red onion, and cucumber (if using) into small, neat cubes. Aim for similar size so they layer nicely. Place them in a bowl and immediately toss with the 2 tablespoons lemon juice to prevent the apple from browning and to add a bright note.
Stir in the chopped dill and a pinch of salt and pepper. Taste a small spoonful; you want a pleasantly sharp, fresh flavor to contrast with the rich herring. Adjust seasoning if needed and set aside.
Step 3: Bloom the gelatin
Pour 1/2 cup (120 ml) of the cold water into a small bowl. Sprinkle the powdered gelatin evenly over the surface; do not dump it in a heap or it may clump. Let it sit undisturbed for 5–10 minutes. The granules will absorb the water and swell, forming a thick, jelly-like mass. This is called blooming and ensures the gelatin will dissolve smoothly later.
While the gelatin blooms, proceed to the next step so you are ready to melt it into the warm liquid.
Step 4: Make and season the gelatin base
In a small saucepan, combine the reserved 1 1/4 cups (300 ml) herring brine, the remaining 1/2 cup (120 ml) water, and the 3/4 cup (180 ml) white wine or apple juice. Add the sugar. Start with 1 tablespoon; you can add more later if your brine is particularly sharp.
Warm this mixture over medium-low heat until it is steaming and hot but not boiling (you should be able to dip a clean finger briefly without burning). Boiling can weaken gelatin, so keep the heat moderate.
Remove the pan from the heat. Add the bloomed gelatin to the hot liquid and whisk gently until completely dissolved and the liquid is clear. If you see tiny grains, return the pan to very low heat and stir until they disappear—do not let it boil.
Taste carefully (it will be warm): it should be pleasantly tangy, mildly sweet, and nicely seasoned. Remember it will taste slightly milder once chilled. Adjust sweetness with a bit more sugar, or acidity with a few drops of lemon juice or vinegar, if needed.
Set the pan aside to cool to room temperature, about 15–20 minutes. Stir occasionally so a skin does not form. The liquid should be pourable but not hot when you begin layering.
Step 5: Start the base layer
To give the terrine a smooth top (which will later become the presentation side), spoon a thin layer of the cooled gelatin mixture into the lined loaf pan—just enough to cover the bottom by a few millimeters. Place the pan in the refrigerator for about 10 minutes, until the gelatin is just starting to thicken but not fully set. This helps keep the first pieces of herring and apple from sinking.
Once lightly thickened, remove the pan from the fridge. Have your herring pieces and apple-onion mixture ready.
Step 6: Layer the terrine
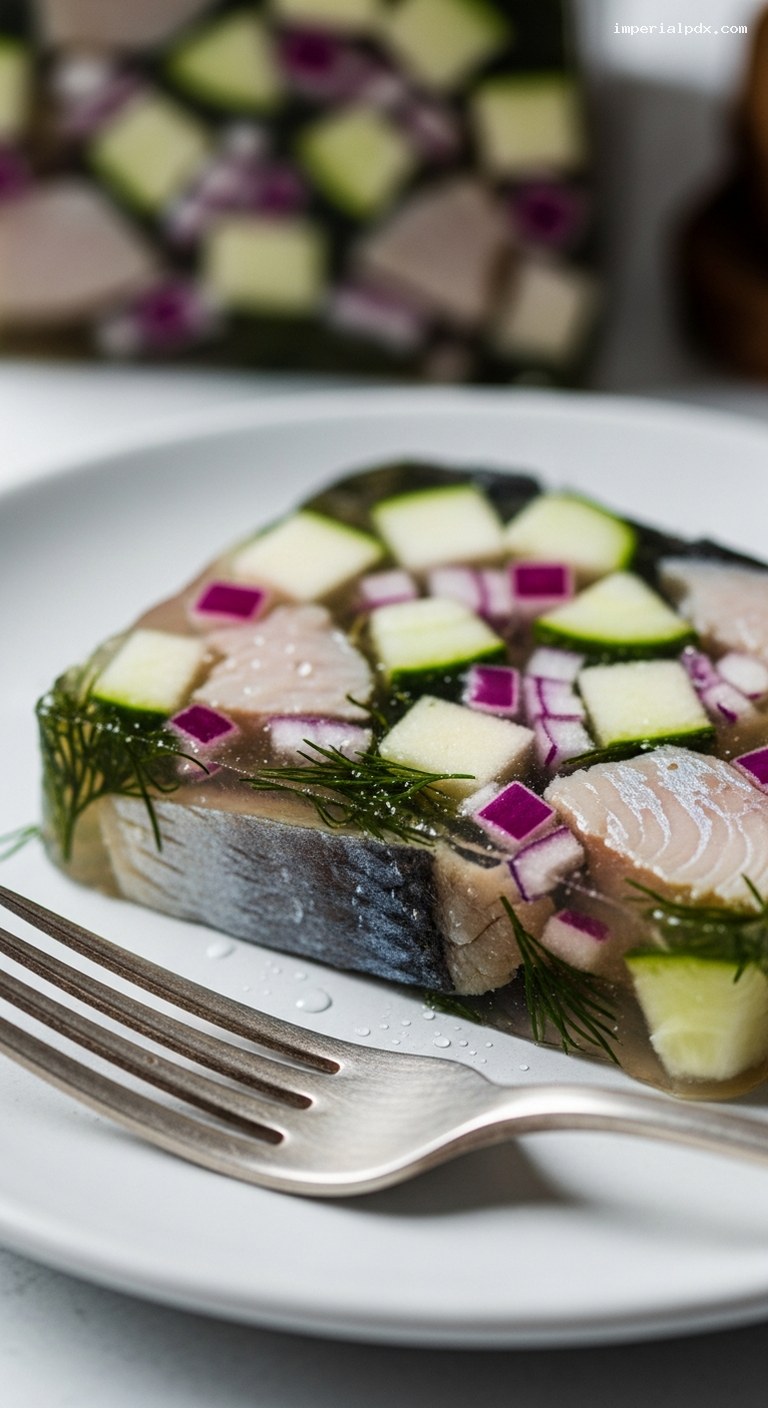
Build up the terrine in several layers for pretty slices. Scatter a layer of herring pieces over the base, leaving small gaps between them. Spoon some of the apple-onion-cucumber-dill mixture into the gaps and over the fish, using about a third of each component in the first layer.
Gently ladle over enough gelatin mixture to just cover this layer. Tap the pan lightly on the counter to dislodge trapped air bubbles.
Repeat with a second and third layer: herring, then apple mixture, then enough gelatin to cover each time. Try to distribute the ingredients evenly so every slice shows attractive, colorful flecks of apple, onion, and dill. If you like, reserve a few pretty dill fronds and the neatest herring pieces for the final layer nearest the bottom (which will become the visible top when unmolded).
Finish by pouring any remaining gelatin mixture over the top so everything is submerged. Again, tap the pan gently to settle the contents and smooth the surface.
Step 7: Chill until set and serve
Fold the overhanging plastic wrap loosely over the surface to cover. Place the terrine in the refrigerator and chill until completely firm, at least 6 hours or overnight. The longer chill time not only sets the gelatin but also melds the flavors.
To unmold, peel back the plastic from the surface, place a serving platter upside down over the loaf pan, and invert the whole thing. Gently lift off the pan, then peel away the plastic wrap. If the terrine resists, briefly dip the outside of the pan in warm water for 5–10 seconds before inverting.
Use a long, sharp knife dipped in hot water and wiped dry between cuts to slice the terrine into 1–1.5 cm (about 1/2-inch) slices. Serve well chilled with dark rye bread, crispbread, or small boiled potatoes, plus butter or crème fraîche, lemon wedges, and extra dill or chives.
Pro Tips
- Control the firmness: If you like a very soft, quivering set, reduce the gelatin slightly (to about 1 1/4 Tbsp). For very clean, buffet-style slices that travel well, keep the full 1 1/2 Tbsp.
- Balance the sweet-sour: Different brands of pickled herring vary. Taste the warm gelatin mixture and adjust with small additions of sugar, wine vinegar, or lemon juice until it tastes pleasantly rounded.
- Dry the herring gently: Patting the herring pieces lightly with paper towels keeps excess moisture from diluting the gelatin and helps the layers hold together.
- Use a sharp, thin knife: Warm the blade in hot water and wipe dry before slicing for neat, restaurant-style slices that show off the layers.
- Chill on a level surface: Make sure the terrine sits flat in the fridge; a slanted shelf can give you lopsided layers.
Variations
- Horseradish kick: Stir 1–2 teaspoons of prepared horseradish into the cooled gelatin base for a gentle heat that pairs beautifully with herring.
- Root vegetable version: Replace the cucumber with finely diced cooked beetroot and carrot for a more traditional Nordic look with jewel-toned slices.
- Creamy swirl: After pouring the final layer of gelatin, dot the surface with tiny spoonfuls of crème fraîche and swirl lightly with a toothpick for a marbled, slightly richer finish (this will become the top when unmolded).
Storage & Make-Ahead
This terrine is ideal for making ahead. Once fully set, keep it covered in the loaf pan or tightly wrapped on its serving platter. Store in the refrigerator for up to 4 days. For best texture and flavor, serve it well chilled straight from the fridge.
If you are preparing it for a party, you can make it 1–2 days in advance. Slice just before serving, or slice up to a few hours ahead and fan the pieces on a platter, covering closely with plastic wrap to prevent drying. Because this is a gelatin-based dish with fish, do not freeze it: the texture of both the gelatin and the herring will suffer.
Nutrition (per serving)
Approximate values for 1 of 8 servings (without bread or accompaniments): about 220 calories; 14 g protein; 14 g fat; 9 g carbohydrates; 1 g fiber; 5–7 g sugar; 650–800 mg sodium. Actual values will vary based on the brand of pickled herring, specific brine composition, and any serving extras.