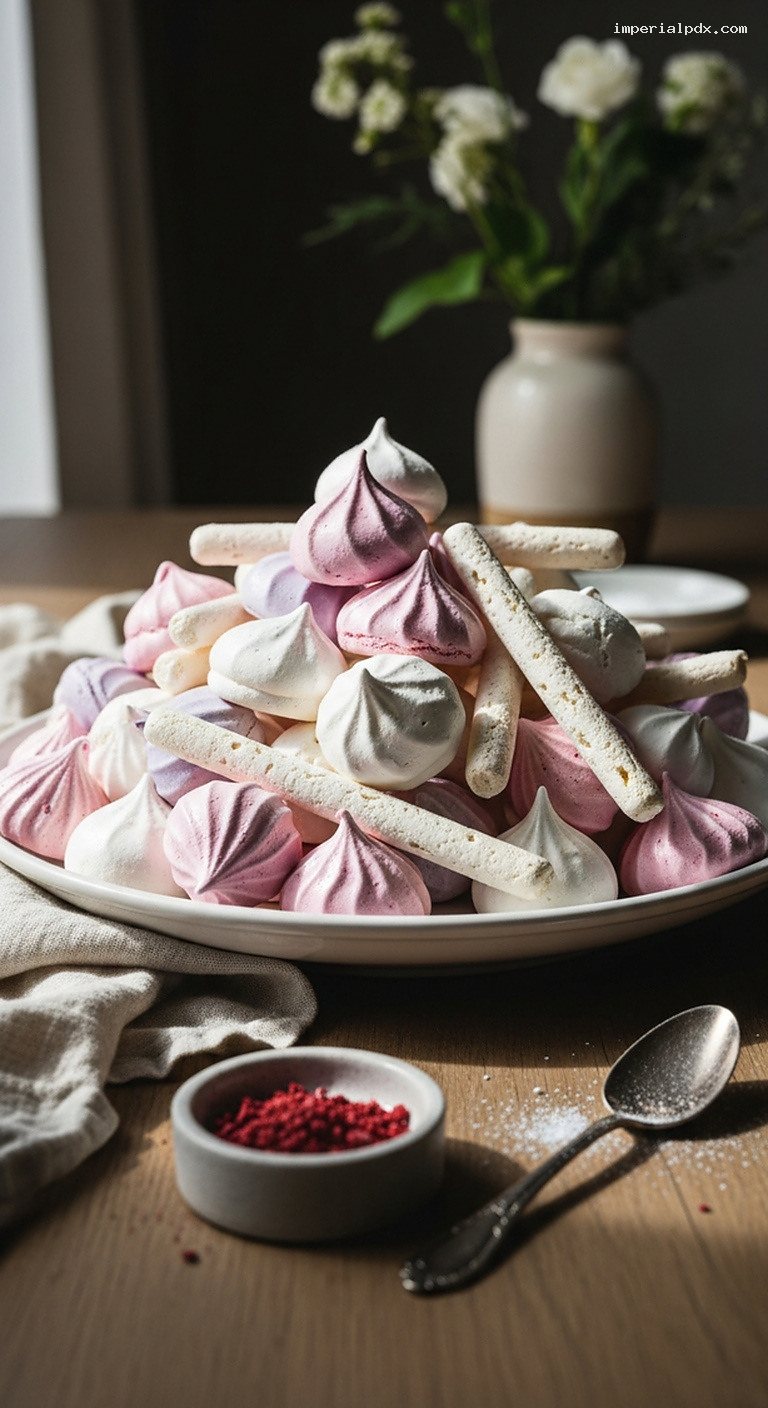
Meringues françaises — Crisp, Melt-in-Your-Mouth French Meringues
Quick Recipe Version (TL;DR)
Quick Ingredients
- 4 large egg whites (about 120 g), room temperature
- 1 cup (200 g) superfine or granulated sugar
- 1/4 tsp cream of tartar or 1/2 tsp fresh lemon juice
- Pinch fine salt
- 1 tsp pure vanilla extract
- Optional: 1–2 tsp fruit powder or flavored extract, gel food coloring
Do This
- 1. Preheat oven to 200°F (95°C). Line 2 baking sheets with parchment paper.
- 2. Whisk room-temperature egg whites, salt, and cream of tartar (or lemon juice) on medium speed until soft peaks form.
- 3. Gradually add sugar, 1–2 tbsp at a time, beating on medium-high until stiff, glossy peaks form and sugar is fully dissolved (about 6–8 minutes).
- 4. Beat in vanilla and any fruit extract; gently fold in fruit powder and a tiny amount of gel coloring if using.
- 5. Pipe or spoon small domes or sticks onto prepared sheets, spacing slightly apart.
- 6. Bake for 1 hour 45 minutes, then check: meringues should feel dry and lift easily. Turn oven off and leave trays inside 30–45 minutes to dry.
- 7. Cool completely, then store in an airtight container at room temperature.
Why You’ll Love This Recipe
- Crisp on the outside and light as air inside, they practically melt on your tongue.
- Simple pantry ingredients turn into a bakery-style treat with minimal hands-on time.
- Endlessly customizable with colors, vanilla, citrus, or fruity essences.
- Perfect for using up extra egg whites and ideal for gifting or decorating desserts.
Grocery List
- Produce: 1 lemon (if using lemon juice or zest)
- Dairy: None
- Pantry: Eggs, sugar, fine salt, cream of tartar (optional), vanilla extract, fruit extract or fruit powder (optional), gel food coloring (optional)
Full Ingredients
Basic French Meringues
- 4 large egg whites (about 120 g), at room temperature
- 1 cup (200 g) superfine sugar (caster sugar preferred; granulated works if well whipped)
- 1/4 teaspoon cream of tartar or 1/2 teaspoon fresh lemon juice
- 1 small pinch fine sea salt
- 1 teaspoon pure vanilla extract
Optional Flavor & Color Variations
- 1–2 teaspoons finely ground freeze-dried raspberry, strawberry, or passion fruit powder
- 1/4–1/2 teaspoon additional extract (e.g., almond, orange blossom, lemon, or rose) to taste
- Gel food coloring in soft pastel shades (e.g., blush pink, lilac, pale pistachio) — a tiny drop goes a long way
- Finely grated zest of 1/2 lemon or orange, if you like a citrusy note
For Piping & Baking
- 2 large baking sheets
- Parchment paper (or silicone baking mats)
- Piping bag fitted with a large round or star tip (or simply 2 spoons)
Step-by-Step Instructions
Step 1: Prepare the oven and pans
Preheat your oven to 200°F (95°C), with racks in the upper and lower thirds. Line 2 large baking sheets with parchment paper. If you plan to pipe neat shapes, you can lightly draw circles or lines on the underside of the parchment as a guide, then flip it over so the pencil marks do not touch the meringue.
Meringues are sensitive to grease. Make sure your baking sheets, mixing bowl, and beaters are completely clean and dry. If you like, wipe the inside of your bowl with a paper towel dipped in a bit of lemon juice or vinegar, then dry it. This helps remove any invisible grease that could deflate the egg whites.
Step 2: Separate and temper the egg whites
Separate the eggs while they are cold (it is easier this way), placing the whites in a large, spotlessly clean mixing bowl and the yolks in another container for another use.
Check carefully: there should be no trace of yolk in the whites, or they will not whip properly. Once separated, let the egg whites sit at room temperature for 20–30 minutes to warm slightly. Room-temperature whites whip to greater volume and more stability.
Step 3: Start whipping the meringue base
Add the pinch of salt and the cream of tartar (or lemon juice) to the egg whites. Using a stand mixer with the whisk attachment or a hand mixer, beat the whites on medium speed until they become frothy and opaque and just reach soft peaks. This typically takes about 2–3 minutes.
Soft peaks mean that when you lift the whisk, the tips of the foam will curl over gently instead of standing up straight. At this stage, avoid rushing and keep the speed moderate so the foam stays fine and stable.
Step 4: Gradually add sugar and whip to stiff, glossy peaks
With the mixer running on medium-high speed, start adding the sugar 1–2 tablespoons at a time. Sprinkle it in slowly so it has time to dissolve. This gradual addition is key to smooth, glossy meringues instead of grainy ones.
Continue beating for about 6–8 minutes, scraping down the bowl once or twice. The mixture will grow thick, glossy, and bright white. Test for stiff peaks: lift the whisk; the meringue should stand up tall with just a slight bend at the tip and look very shiny. Rub a tiny bit of meringue between your fingers; it should feel smooth, with little to no sugar grit. If it still feels sandy, continue beating for another minute or two.
Step 5: Add flavorings and optional color
Once the meringue is at stiff peaks, pour in the vanilla extract and any additional liquid extract (like almond or citrus). Beat briefly, just until incorporated, 5–10 seconds.
If you are using fruit powder or citrus zest, gently fold it into the meringue with a spatula using broad, sweeping motions so you do not deflate the mixture. For color, use a toothpick to add the tiniest dab of gel food coloring. Fold very lightly to create an even tint, or only partially fold for a pretty marbled effect. The meringue should remain thick and stand in peaks.
Step 6: Pipe or spoon the meringue shapes
Transfer the meringue to a piping bag fitted with a large round or star tip. Fill the bag about two-thirds full to keep it manageable. Twist the top closed.
For domes, hold the bag vertically about 1 cm above the tray and pipe small mounds 2.5–3 cm wide, lifting straight up to finish with a little peak. For sticks, pipe lines about 5–7 cm long. Space the shapes about 1–2 cm apart; they will not spread much while baking.
If you do not have a piping bag, simply use two teaspoons to drop small dollops or shape rustic logs. The flavor and texture will be just as lovely.
Step 7: Bake low and slow, then dry
Place both trays in the preheated oven. Bake for 1 hour 45 minutes, rotating the trays front-to-back and swapping racks halfway through for even baking. The meringues are done when they feel dry and firm on the outside and lift easily from the parchment without leaving sticky bits behind.
Turn the oven off and leave the meringues inside with the door closed for an additional 30–45 minutes. This gentle drying time helps them become perfectly crisp all the way through without browning. After that, crack the oven door open slightly with a wooden spoon and let them cool completely.
Step 8: Cool fully and store
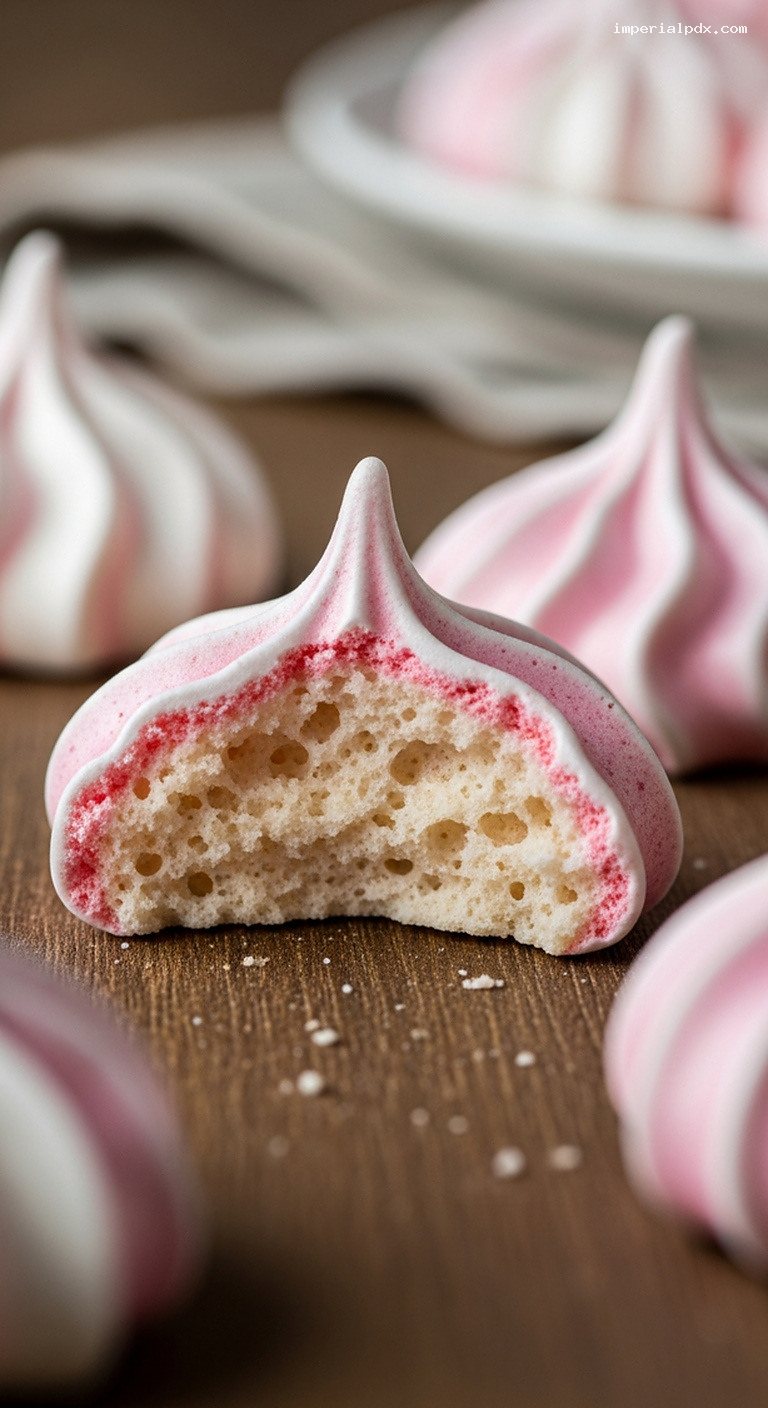
Once the meringues are completely cool, gently peel them off the parchment. They should be weightless, crisp, and hollow-sounding when tapped underneath.
Transfer them to an airtight container right away to protect them from humidity. Layer them carefully between sheets of parchment if stacking, as they are delicate. Store at room temperature until ready to serve, decorate cakes, or pack into gift bags.
Pro Tips
- Use impeccably clean equipment. Any trace of fat (including egg yolk) will prevent the whites from whipping properly. Glass or metal bowls work best; avoid plastic if you can.
- Superfine sugar dissolves best. If you only have regular granulated sugar, pulse it briefly in a food processor to make it finer (but not powdered).
- Add sugar slowly. Rushing this step can cause grainy meringue and weeping during baking. Take your time; the mixer does the work.
- Bake on dry days if possible. Humid weather makes meringues sticky. If your kitchen is damp, keep them in an airtight container with a little packet of food-safe desiccant or some uncooked rice wrapped in paper.
- Avoid opening the oven frequently. Sudden temperature changes can cause cracking. Check them just once near the end of baking.
Variations
- Berry swirled meringues: Fold in 1–2 teaspoons freeze-dried raspberry or strawberry powder and only partially mix to create pink streaks. Pipe into domes and dust very lightly with extra powder just before baking.
- Citrus-vanilla kisses: Add 1 teaspoon finely grated lemon or orange zest along with the vanilla. Tint very pale yellow or leave white for a classic look.
- Pastel rainbow sticks: Divide the meringue into 3–4 bowls and tint each a different soft pastel shade. Spoon the colors side by side into your piping bag to create multi-colored sticks with pretty stripes.
Storage & Make-Ahead
Once completely cooled, store meringues in an airtight container at room temperature for up to 7 days. Keep them away from moisture and strong odors (they can pick up flavors from nearby foods). If they soften slightly from humidity, you can refresh them by placing them on a baking sheet in a 200°F (95°C) oven for about 10–15 minutes, then letting them cool in the oven with the door cracked open.
Meringues do not freeze especially well, as condensation can make them sticky when thawed, so room-temperature storage is best. You can, however, make them a few days in advance of a party or holiday and keep them sealed until serving.
Nutrition (per serving)
Approximate values per serving (about 5 small meringues, 1/8 of the batch):
Calories: ~105 kcal; Carbohydrates: ~25 g; Sugars: ~24 g; Protein: ~2 g; Fat: 0 g; Fiber: 0 g; Sodium: minimal. Values will vary slightly based on size and any added flavorings or colors.