Quick Recipe Version (TL;DR)
Quick Ingredients
- 1.5 kg (3.3 lb) pork shoulder, well-marbled, chilled
- 500 g (1.1 lb) firm pork back fat, chilled
- 52 g fine sea salt (about 2.9 Tbsp)
- 5 g curing salt #2 (pink salt for dry curing, about 1 tsp)
- 6 large garlic cloves, finely minced
- 2 tsp dextrose or sugar (optional, for fermentation)
- 2 tsp freshly ground black pepper + 1½ tsp white pepper
- ½ cup (120 ml) dry white wine, chilled
- 38–42 mm natural hog casings (about 1.5–2 m / 5–6 ft)
- Starter culture for dry sausage (as per package, strongly recommended)
Do This
- 1) Chill all meat, fat, grinder parts, and mixing bowl until very cold but not frozen (near 0–4°C / 32–39°F).
- 2) Cut meat and fat into 2–3 cm (1 in) chunks. Toss with salt, curing salt, spices, garlic, sugar, and wine. Refrigerate 1 hour.
- 3) Rehydrate starter culture if using. Coarsely grind meat and fat through a 6–8 mm (¼–⅜ in) plate into a chilled bowl.
- 4) Add starter culture. Mix by hand until the meat is sticky and cohesive and holds together when squeezed.
- 5) Rinse and soak hog casings. Stuff firmly, twist into 25–30 cm (10–12 in) links, tie, and prick out air pockets.
- 6) Ferment sausages at 18–24°C (65–75°F), 85–95% humidity for 24–36 hours, then dry at 12–15°C (54–59°F), 75–80% humidity for 3–5 weeks, until 35–40% weight loss. Slice thinly and serve.
Why You’ll Love This Recipe
- Classic French saucisson sec flavor: garlicky, peppery, and gently perfumed with white wine.
- Deeply satisfying project for curious home cooks who love charcuterie and slow food.
- Perfect for cheese boards, picnics, and gatherings; it keeps for weeks once fully dried.
- Teaches core dry-curing techniques you can reuse for many other salamis and cured meats.
Grocery List
- Produce: Garlic (about 1 small head)
- Dairy: None
- Pantry: Fine sea salt, curing salt #2 (pink curing salt for long dry cures), dextrose or sugar, black pepper, white pepper, optional spices (coriander, nutmeg), dry white wine, natural hog casings (usually at butcher or online), starter culture for dry sausage (charcuterie supplier or online)
Full Ingredients
Meat & Fat
- 1.5 kg (3.3 lb) pork shoulder (Boston butt), well-marbled, 80–85% lean, trimmed of glands
- 500 g (1.1 lb) firm pork back fat, skin removed
Seasoning & Cure
- 52 g fine sea salt (2.6% of meat + fat weight; about 2.9 Tbsp)
- 5 g curing salt #2 (pink curing salt for dry-cured products, 0.25% of weight; about 1 level tsp)
- 6 large garlic cloves (about 20 g), very finely minced or crushed
- 2 tsp (8 g) dextrose or granulated sugar (optional but recommended for fermentation)
- 2 tsp (6 g) freshly ground black pepper
- 1½ tsp (4 g) freshly ground white pepper
- ½ cup (120 ml) dry white wine (such as Sauvignon Blanc or Pinot Grigio), well chilled
Optional Flavor Boosters
- 1 tsp (2 g) ground coriander
- ¼ tsp (1 g) freshly grated nutmeg
Casings & Culture
- 1.5–2 m (5–6 ft) natural hog casings, 38–42 mm (1½–1¾ in) diameter
- Starter culture for dry sausage (such as T-SPX or similar), amount as specified on the package for 2 kg meat
Equipment (Strongly Recommended)
- Digital kitchen scale (for accurate salt and cure measurements)
- Meat grinder with 6–8 mm (¼–⅜ in) plate
- Sausage stuffer (hand-crank or stand mixer attachment)
- Thermometer for room/fridge temperature monitoring
- Hygrometer for humidity monitoring (for drying chamber)
- Butcher’s twine
- Sausage pricker or very fine sterilized needle
- Hooks or dowels for hanging sausages
- Optional: pH meter for precise fermentation monitoring
Step-by-Step Instructions
Step 1: Prepare Your Workspace and Chill Everything
Safety and texture both start with cold equipment and cold meat. Place your grinder parts (auger, plate, blade), mixing bowl, and sausage stuffer parts in the freezer for at least 30 minutes. Cold metal helps keep the fat firm so it cuts cleanly instead of smearing.
Trim your pork shoulder of any glands or very hard connective tissue and cut into 2–3 cm (1 in) chunks. Do the same with the pork back fat. Spread the cubes on a tray in a single layer and place in the freezer for about 30 minutes, or until very cold and slightly firm at the edges but not frozen solid. Aim to keep the meat between 0–4°C (32–39°F) whenever you are grinding or mixing.
Step 2: Season the Meat and Let It Chill
In a small bowl, combine the fine sea salt, curing salt #2, black pepper, white pepper, dextrose or sugar (if using), and any optional spices (coriander, nutmeg). Mix thoroughly so the curing salt is evenly dispersed.
Transfer the chilled meat and fat cubes to a large mixing bowl. Sprinkle the seasoning blend evenly over the cubes. Add the finely minced garlic. Pour in the chilled white wine. With clean hands or a spatula, toss everything thoroughly until every piece of meat and fat is lightly coated with the curing and seasoning mixture.
Cover the bowl and refrigerate for at least 1 hour (and up to 12 hours). This short rest helps the salt penetrate and keeps everything very cold for grinding.
Step 3: Rehydrate Starter Culture and Grind the Meat
If you are using a starter culture (highly recommended for safety and consistent flavor), rehydrate it according to the package instructions. Typically this means sprinkling the culture into 30–50 ml (2–3 Tbsp) of non-chlorinated, lukewarm water (about 20–25°C / 68–77°F) and letting it sit for 15–20 minutes.
As the culture hydrates, assemble your chilled grinder with a coarse plate (6–8 mm / ¼–⅜ in). Working quickly so everything stays cold, feed the seasoned meat and fat through the grinder into a chilled bowl set in a larger bowl of ice, if possible. You are aiming for a coarse, rustic grind with visible chunks of fat, not a fine paste.
Once all the meat and fat are ground, return the bowl to the fridge for 10–15 minutes if it has warmed up at all.
Step 4: Mix to Develop the Bind
Pour the rehydrated starter culture over the ground meat, scraping in any remaining liquid. With clean, cold hands, begin mixing and kneading the sausage meat vigorously. At first it will look loose and crumbly; after a few minutes it should start to look sticky and cohesive.
You are developing a “bind” in the meat proteins so the sausage slices cleanly and holds together. A simple test: grab a small handful and squeeze it firmly, then turn your hand upside down. If the clump sticks to your palm and does not immediately fall off, you have mixed enough.
Once the mixture is tacky and well-bound, cover and refrigerate while you prepare the casings. Keep it as close to 0–4°C (32–39°F) as you can.
Step 5: Prepare Casings and Stuff the Sausages
Rinse the hog casings under cool running water, both outside and inside. To rinse the inside, run water through one open end like a hose. Then soak the casings in a bowl of cool water for at least 30 minutes. Change the water once or twice to remove excess salt.
Fit your sausage stuffer with an appropriate horn for 38–42 mm casings. Slide a length of casing onto the horn, leaving a 10–15 cm (4–6 in) tail to tie off. Tie a tight knot in the end of the casing.
Fill the stuffer with the chilled sausage mixture, removing any large air pockets as you go. Begin stuffing, supporting the casing with one hand to ensure it fills firmly but not to the point of bursting. You want a tight, even sausage with minimal air pockets.
Once you have a long coil, twist into links about 25–30 cm (10–12 in) long, or whatever size you prefer. Tie off each link with butcher’s twine at both ends. Using a sterilized sausage pricker or very fine needle, gently prick any visible air pockets to release trapped air.
Step 6: Weigh, Label, and Hang for Fermentation
Weigh each sausage and record the starting weight on a tag tied to the string or in a notebook. You will use this number later to know when the sausages have lost 35–40% of their weight and are fully dried.
Hang the sausages on hooks or dowels in a warm, humid place to ferment: 18–24°C (65–75°F) with 85–95% relative humidity. A dedicated fermentation box, warm room, or oven with the light on and a pan of warm water can sometimes work, as long as you can monitor temperature and humidity.
Let the sausages ferment for 24–36 hours, or as directed by your starter culture instructions. During fermentation, the sausages should become a bit darker in color, slightly tacky on the outside, and may develop a mild tangy aroma. If you have a pH meter, you are aiming for a pH of about 5.0–5.3.
Step 7: Dry and Age Until Firm
After fermentation, move the sausages to your drying/aging chamber. Ideal conditions for saucisson sec are:
- Temperature: 12–15°C (54–59°F)
- Relative humidity: 75–80%
- Gentle air flow, not direct drafts
A modified refrigerator with an external thermostat, small fan, and humidity control, or a naturally cool cellar can work if you can keep conditions stable.
Hang the sausages so they do not touch each other. Dry for 3–5 weeks, depending on size and your environment. Weigh each sausage weekly. When a sausage has lost about 35–40% of its original weight, it should feel firm throughout and is typically ready to eat. For example, a sausage that started at 500 g is done around 300–325 g.
You may see a fine, white, powdery mold develop on the surface; this is usually a beneficial Penicillium mold and is normal. Brush off any excess before slicing. If you see fuzzy green, black, or brightly colored mold, wipe the surface with a cloth dipped in white vinegar and monitor closely; discard if you notice off smells or sliminess.
Step 8: Slice, Serve, and Enjoy
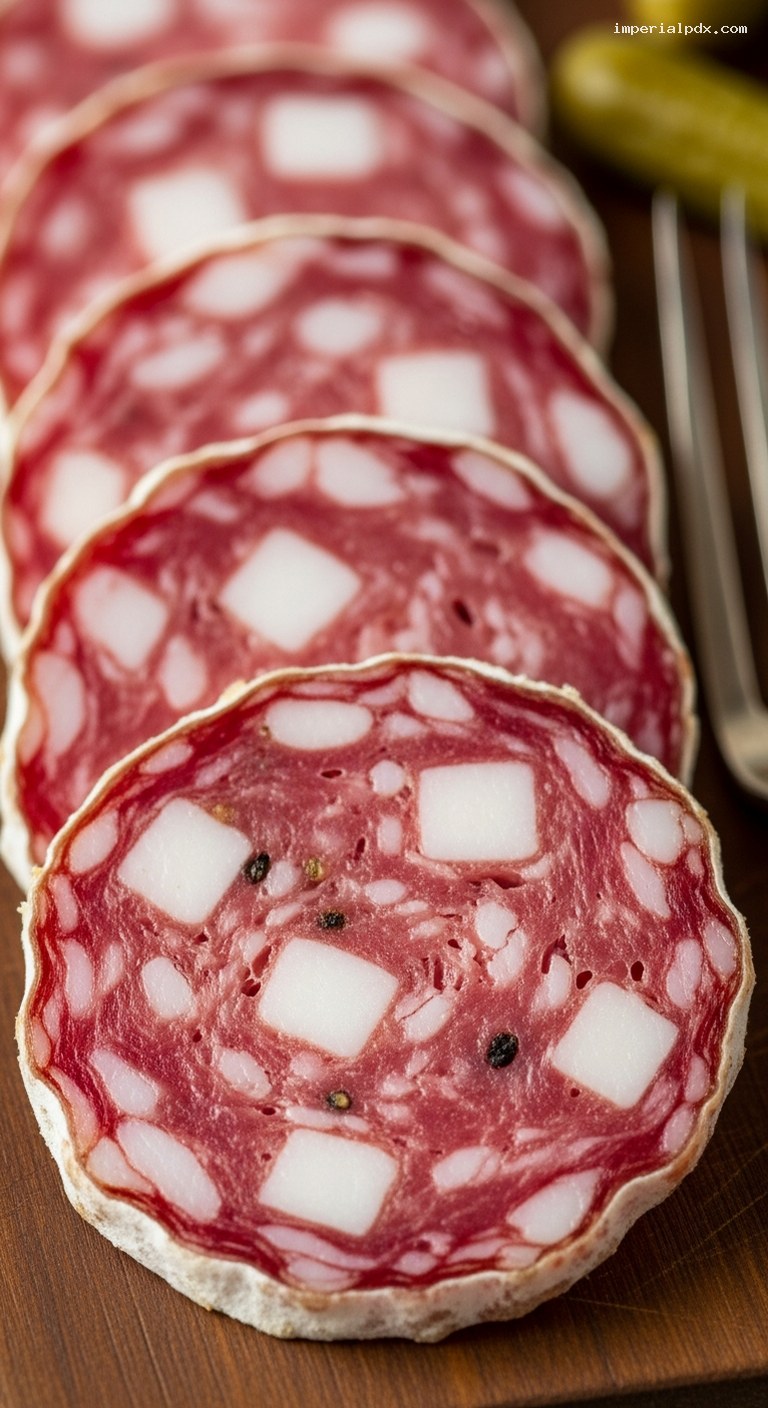
Once the sausages have reached your target weight loss and feel firm all the way through, they are ready. Cut one open: the interior should be a deep rosy color with clearly defined white fat pieces, no gray spots, and a pleasant cured aroma. The texture should be dry but not crumbly.
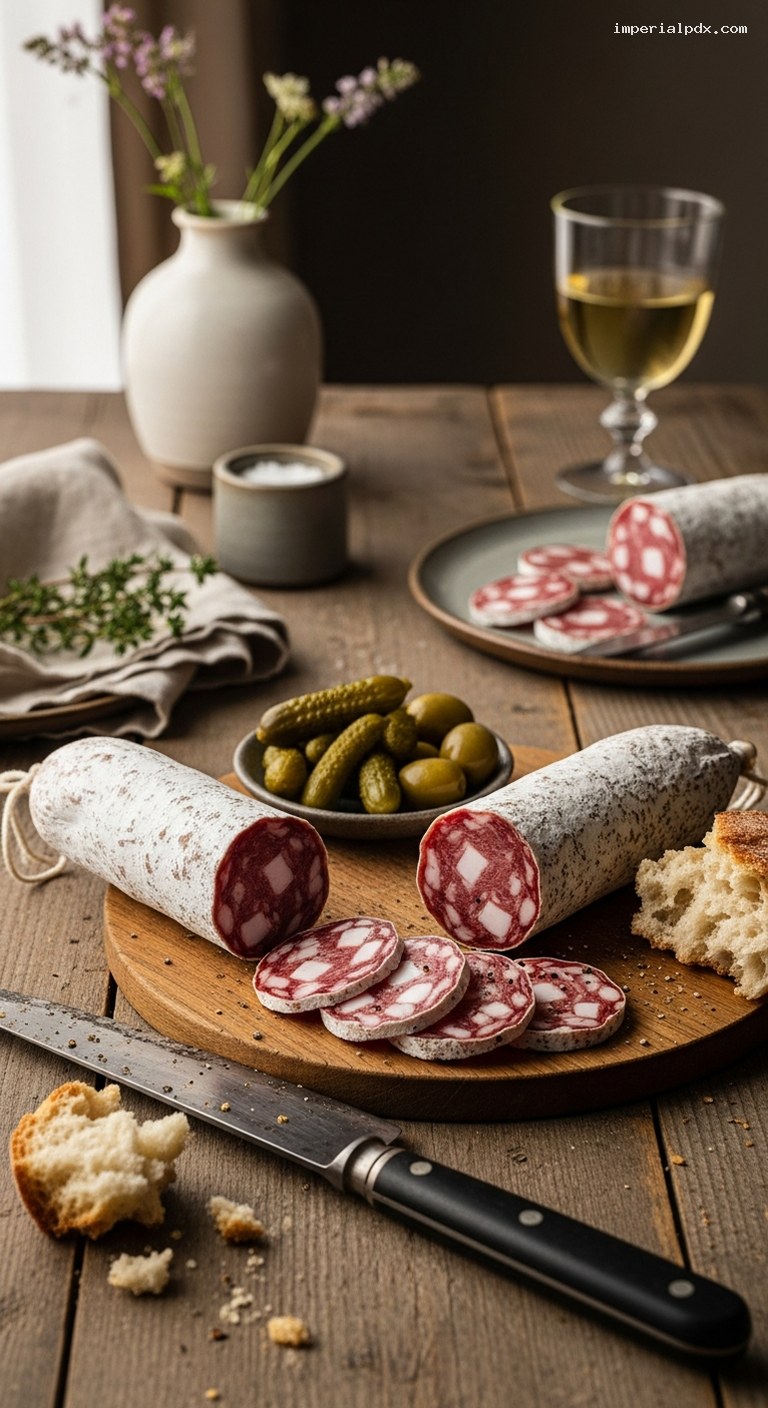
To serve, slice the saucisson sec very thinly on a slight diagonal with a sharp knife. Arrange the slices on a wooden board with crusty bread, olives, cornichons, mustard, and cheese. The flavor continues to develop over time, so you can enjoy the sausages over several weeks.
For the cleanest slices, chill the sausage briefly before cutting, and wipe your knife between cuts if it becomes greasy.
Pro Tips
- Measure by weight, not volume. For salt and curing salt especially, use a digital scale. Accurate percentages keep the sausage safe and properly seasoned.
- Keep it cold at all stages. Warm fat smears, giving a pasty texture. If the meat ever feels soft or greasy while grinding or mixing, chill it again before continuing.
- Starter culture is your friend. While some traditionalists rely on wild fermentation, a commercial starter culture gives more predictable acidity and reduces risk, especially for beginners.
- Control your drying rate. If the outside is drying hard while the center is still soft (case hardening), increase humidity slightly or lower the temperature to slow drying.
- Know your audience. As with all dry-cured meats, individuals who are pregnant, elderly, very young, or immunocompromised should consult a health professional before consuming.
Variations
- Herbes de Provence Saucisson: Add 2–3 tsp dried Herbes de Provence (or a mix of thyme, rosemary, and savory) to the seasoning blend for a distinctly southern French aroma.
- Spicy Saucisson: Add 1–2 tsp crushed red pepper flakes or 1 tsp ground Espelette pepper to the mix for a gentle heat that complements the garlic and wine.
- Coarse Pepper Crust: After stuffing and pricking, roll the sausages lightly in coarsely cracked black pepper before fermenting for a rustic, peppery exterior.
Storage & Make-Ahead
Saucisson sec is inherently a make-ahead project. Once the sausages are fully dried (35–40% weight loss), you can store them:
- Refrigerated: Wrap in breathable paper (butcher paper or parchment, not plastic) and keep in the refrigerator for 3–4 weeks. Avoid airtight plastic wrap, which can encourage mold or off odors.
- Cool cellar or curing chamber: If you have a dedicated curing space at 10–15°C (50–59°F) and moderate humidity, the sausages can hang there for several additional weeks, slowly growing more intense in flavor.
- Freezer (for long storage): For very long storage, you can wrap tightly in plastic, then in foil, and freeze for up to 3 months. Texture can become slightly drier, but it remains tasty. Thaw slowly in the fridge before slicing.
Once sliced, keep leftovers wrapped in parchment or wax paper inside a loose plastic bag or container in the fridge and use within 5–7 days for the best texture and flavor.
Nutrition (per serving)
Nutrition will vary with exact fat content and thickness of slices, but approximate values for a 30 g (about 4–6 thin slices) serving are:
- Calories: ~130 kcal
- Protein: ~7 g
- Total fat: ~10 g
- Saturated fat: ~4 g
- Carbohydrates: <1 g
- Sodium: ~550–650 mg
Because this is a cured, high-sodium product, enjoy in moderate portions as part of a balanced meal or charcuterie board.