Quick Recipe Version (TL;DR)
Quick Ingredients
- 1.5 kg (3.3 lb) beef top round, rump, or silverside, trimmed
- 125 ml (1/2 cup) apple cider or brown malt vinegar
- 2 tbsp kosher or coarse sea salt
- 2 tbsp brown sugar
- 2 tbsp whole coriander seeds, toasted and crushed
- 1 tbsp freshly ground black pepper
- 2 tsp red chili flakes (adjust to taste)
- 1 tsp smoked paprika
- 1 tsp garlic powder
- 1 tsp onion powder
- 2 tbsp Worcestershire sauce (optional but great)
Do This
- 1. Trim beef of surface fat and silvery membranes; cut into long strips 2–3 cm thick along the grain.
- 2. Toast coriander seeds in a dry pan, then crush. Mix with salt, sugar, pepper, chili, paprika, garlic, and onion powder.
- 3. In a non-reactive dish, layer beef strips with splashes of vinegar and Worcestershire plus generous pinches of the spice mix.
- 4. Cover and refrigerate 8–12 hours, turning the strips once or twice to cure evenly.
- 5. Pat beef strips dry, then roll them in any remaining spice mix. Thread onto hooks or skewers.
- 6. Hang in a cool, well-ventilated place (18–24°C / 65–75°F) with good airflow for 2–3 days, until firm but still slightly pliable. Slice thinly across the grain and enjoy.
Why You’ll Love This Recipe
- Deeply savory, peppery, and gently fiery strips with classic biltong-style coriander aroma.
- Air-dried for a chewy, charcuterie-style texture that is perfect for snacking or cheese boards.
- Mostly hands-off: a short prep followed by marinating and drying while you get on with life.
- Customizable heat level and drying time so you can make it exactly how you like it.
Grocery List
- Produce: None required (fresh herbs for optional garnish if desired).
- Dairy: None.
- Pantry: Apple cider or brown malt vinegar, kosher or coarse sea salt, brown sugar, whole coriander seeds, black peppercorns, red chili flakes, smoked paprika, garlic powder, onion powder, Worcestershire sauce (optional).
- Meat: 1.5 kg (3.3 lb) beef top round, rump, or silverside.
Full Ingredients
Beef
- 1.5 kg (3.3 lb) beef top round, rump, or silverside, well trimmed of surface fat and silvery membranes
Vinegar Cure & Spice Rub
- 125 ml (1/2 cup) apple cider vinegar or brown malt vinegar
- 2 tbsp kosher salt or coarse sea salt (do not use fine table salt, which is too strong)
- 2 tbsp packed light brown sugar
- 2 tbsp whole coriander seeds
- 1 tbsp whole black peppercorns, freshly ground or coarsely cracked
- 2 tsp red chili flakes (use 1 tsp for mild, 3 tsp for extra spicy)
- 1 tsp smoked paprika (adds subtle smokiness and color)
- 1 tsp garlic powder
- 1 tsp onion powder
- 2 tbsp Worcestershire sauce (optional but recommended for umami and depth)
Optional Serving & Garnish
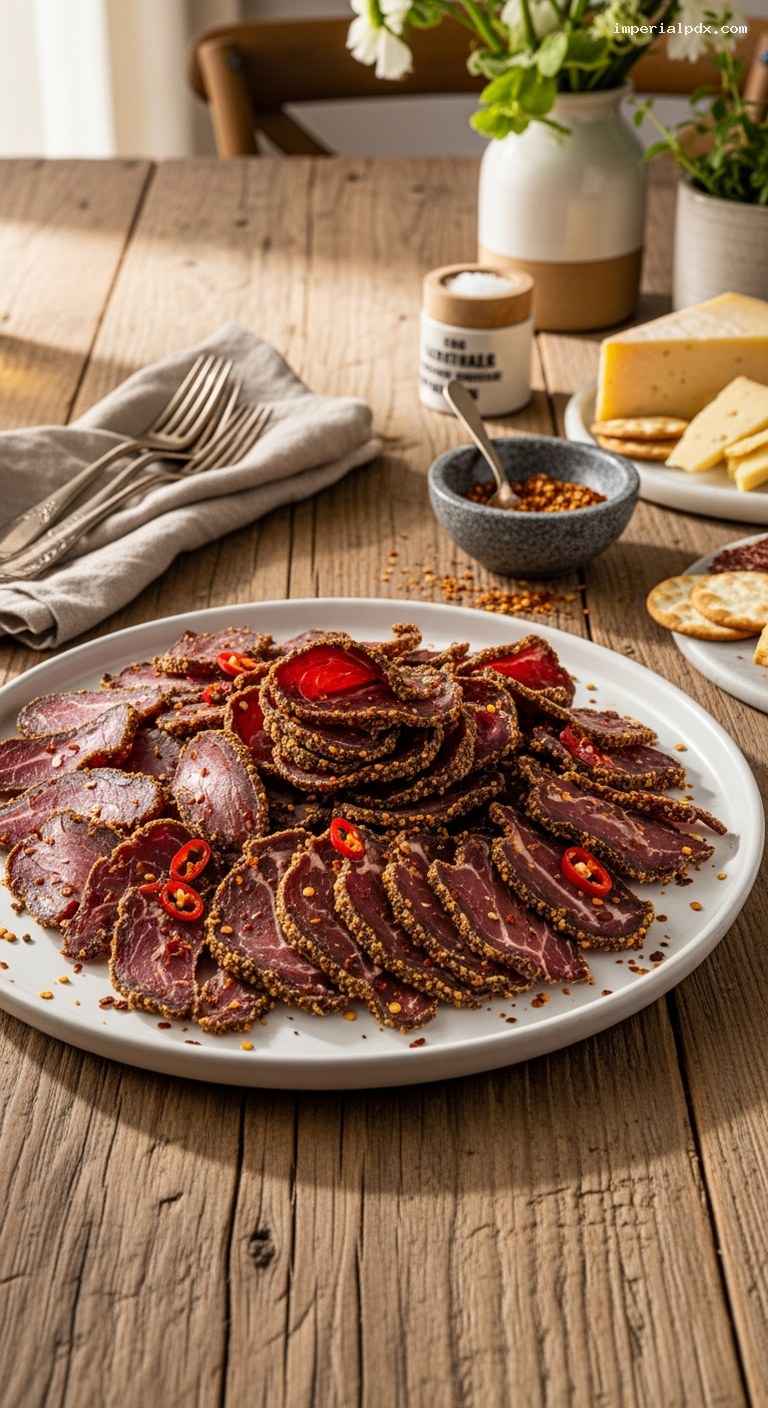
- Coarse sea salt flakes, for sprinkling
- Fresh red chili slices or micro herbs, for visual contrast
- Crackers, sharp cheese, and pickles, for a charcuterie-style platter
Step-by-Step Instructions
Step 1: Choose and trim the beef
Select a lean cut of beef such as top round, rump, or silverside. Look for a piece with minimal marbling and very little internal fat, since fat does not dry well and can go rancid over time.
Using a sharp knife, trim away any thick surface fat and tough silvery membranes. Work slowly, keeping the knife almost flat against the meat to avoid cutting away too much flesh. You do not need to remove every speck of fat, but aim to clear most of the thick, waxy pieces.
Once trimmed, cut the beef into long strips about 2–3 cm (3/4–1 1/4 inch) thick, slicing with the grain (lengthways). These will later be sliced across the grain after drying for tender bites. Thicker strips will be chewier and take longer to dry; thinner strips will dry faster and be less chewy.
Step 2: Toast and crush the spices
Place the coriander seeds in a small dry pan over medium heat. Toast, stirring frequently, for 1–2 minutes until fragrant and slightly darkened, but not burnt. Immediately transfer to a plate to cool briefly so they do not over-toast in the hot pan.
Once cool enough to handle, crush the coriander seeds using a mortar and pestle, a spice grinder (pulse briefly; you want coarse pieces, not powder), or by bashing them in a zip-top bag with a rolling pin. You should see a mix of cracked seeds and coarse fragments.
Combine the crushed coriander with the salt, brown sugar, freshly ground black pepper, chili flakes, smoked paprika, garlic powder, and onion powder in a small bowl. Stir well, breaking up any sugar clumps so the seasoning distributes evenly.
Step 3: Layer the beef with vinegar and seasoning
Use a non-reactive container such as a glass or ceramic baking dish or a food-safe plastic tub that will hold the strips in a few snug layers. Pour a few tablespoons of the vinegar and about 1 tbsp of Worcestershire sauce (if using) into the bottom of the dish.
Lay a single layer of beef strips into the dish. Sprinkle some of the spice mixture over the meat, coating both sides lightly but evenly. Drizzle with a little more vinegar and Worcestershire. Repeat with remaining beef, layering meat, spice mix, and splashes of vinegar/Worcestershire until everything is used. Reserve 1–2 tbsp of the dry spice mix for later.
Gently press the layers down with your hands to help the vinegar and seasoning contact all surfaces of the meat. Cover tightly with a lid or plastic wrap.
Step 4: Cure in the refrigerator (8–12 hours)
Refrigerate the beef for at least 8 hours and up to 12 hours. About halfway through, turn the strips so the top and bottom layers swap places. This helps the cure penetrate evenly and prevents any pieces from sitting in a pool of liquid for too long.
During this time, the salt and vinegar will season the meat and draw out some moisture, and the beef will darken slightly. You do not want the meat swimming in brine; a shallow puddle of seasoned vinegar at the bottom of the dish is normal.
Step 5: Prepare the strips for drying
Remove the beef from the refrigerator. One by one, lift the strips from the dish and gently shake off excess liquid. Pat each strip lightly with paper towels until just damp, not dripping. This helps the surface start drying more quickly.
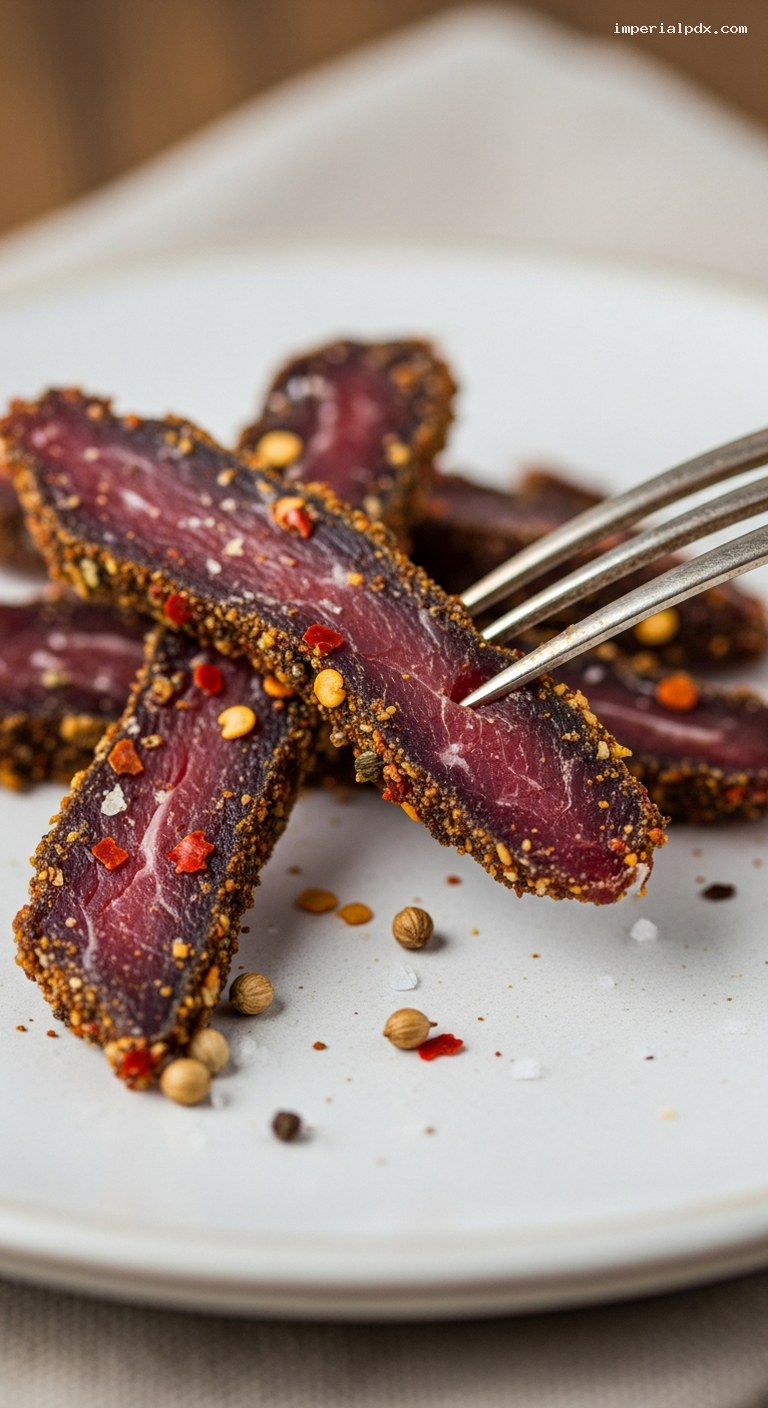
Sprinkle the reserved 1–2 tbsp of spice mixture onto a tray or plate. Roll each strip of beef in this spice, pressing gently so it clings to the surface. This creates the classic coriander-and-pepper crust you expect on biltong-style strips.
Prepare your hanging method: you can use metal S-hooks, butcher’s hooks, or wooden skewers threaded through one end of each strip. If using skewers, make a small hole about 1.5 cm (1/2 inch) from the end of each strip and thread the skewer through so the meat can hang freely.
Step 6: Air-dry the beef safely
Choose a cool, airy place out of direct sunlight, ideally between 18–24°C (65–75°F) with good airflow and relatively low humidity. A well-ventilated pantry, spare room with a fan, or a simple homemade “drying box” with a small fan works well. Avoid very warm, humid areas.
Hang the strips so they do not touch each other. Place a tray or parchment-lined baking sheet underneath to catch any drips. Use a small fan on low speed to keep air gently moving around the meat.
Dry for about 2–3 days, checking once or twice daily. Rotate strips if one side seems to dry faster. The exact time depends on strip thickness, room conditions, and your preferred texture. For classic chewy biltong-style strips, the exterior should be firm and dark, while the center still has a slight give when squeezed.
Step 7: Slice, taste, and adjust dryness
To test for doneness, cut one strip in half. The center should be a deep red-brown color, slightly moist but not raw or squishy. For a drier, more jerky-like biltong, leave the remaining strips to hang longer until they are firmer throughout.
Once you are happy with the texture, bring the strips down. Using a very sharp knife, slice them thinly across the grain into bite-sized strips. Cutting across the grain is key for tenderness; even thicker pieces will chew more pleasantly this way.
Taste a few slices and, only if needed, sprinkle very lightly with extra coarse sea salt. Arrange on a board with cheese, pickles, and crackers for serving, or portion into airtight containers for snacking.
Pro Tips
- Control thickness for texture: 2 cm strips give a softer, slightly pink center after drying; 3 cm strips are chewier and more traditional. Keep thickness consistent so everything dries at a similar rate.
- Do not skip the coriander toast: Toasting the coriander seeds is a small step that dramatically boosts that signature biltong aroma and flavor.
- Airflow matters more than heat: Gentle, constant airflow in a cool room is safer and more effective than high warmth. If humidity is high, a small fan makes a big difference.
- For extra food safety, store chilled: Traditional biltong hangs at room temperature, but for home kitchens, it is safest to store finished strips in the refrigerator in breathable packaging.
- Start mild, then go spicier next batch: If you are unsure about the heat, begin with less chili. You can always add more in future batches once you know your preference.
Variations
- Milder herb biltong-style strips: Reduce chili flakes to 1/2–1 tsp and add 1 tsp dried thyme or dried oregano to the spice mix. The flavor becomes more herbal and less fiery, great for family snacking.
- Smoky chili version: Replace half the chili flakes with smoked chili powder or chipotle powder and increase smoked paprika to 2 tsp. This yields a deeper, barbecue-like smokiness.
- Dehydrator or low-oven method (jerky-like): Instead of hanging, lay the cured and spiced strips on dehydrator trays and dry at 35–40°C (95–104°F) for 6–10 hours, or in an oven at 70°C (160°F) with the door cracked open for 4–6 hours, until the texture suits you. This gives a slightly different texture but similar flavor.
Storage & Make-Ahead
Once fully cooled and sliced, let the biltong-style strips “breathe” in a paper bag or loosely covered container in the refrigerator for a day. This allows moisture to equalize throughout the meat. After that, transfer to an airtight container lined with paper towel, or keep in a breathable cotton bag if you prefer a drier finish. Stored in the refrigerator, the strips keep well for about 2 weeks; in the freezer, up to 2–3 months (wrap tightly to prevent freezer burn). At cool room temperature in a dry climate, they are best eaten within 3–5 days for safety and quality. For entertaining, you can complete the drying step up to 3 days ahead, keep the whole pieces chilled, and slice thinly just before serving for the freshest flavor and texture.
Nutrition (per serving)
Approximate values per serving (about 60 g dried beef): 150 calories; 27 g protein; 3 g fat; 2 g carbohydrates; 1–2 g sugars; 0 g fiber; about 700–800 mg sodium. Actual values will vary based on the cut of beef, exact drying level, and how much spice crust adheres.