Quick Recipe Version (TL;DR)
Quick Ingredients
- 1 whole pork coppa/neck muscle, about 2 kg (4.4 lb), boneless
- 56 g natural sea salt or kosher salt (2.8% of meat weight)
- 5 g Cure #2 (Prague Powder #2; 0.25% of meat weight)
- 20 g sugar (about 1.5 tbsp)
- 10 g freshly ground black pepper (about 1 tbsp)
- 10 g sweet paprika (about 1.5 tbsp)
- 5 g toasted, crushed fennel seeds (about 2 tsp)
- 2–3 g crushed red pepper (about 1/2–1 tsp), to taste
- 4 garlic cloves, finely grated or mashed
- 120 ml dry red or white wine (1/2 cup)
- 1 beef bung or large collagen casing (60–80 mm) + butcher’s twine
Do This
- 1. Trim the pork coppa of glands, loose fat, and ragged edges, aiming for a neat, compact roast.
- 2. Mix salt, Cure #2, sugar, garlic, and wine into a paste; rub thoroughly over every surface and into crevices.
- 3. Seal in a nonreactive container or vacuum bag and cure in the refrigerator (1–4°C / 34–39°F) for 10–14 days, turning daily.
- 4. Rinse lightly, pat completely dry, coat with pepper, paprika, fennel, and chili, then truss very tightly into a firm log.
- 5. Soak and rinse casing, then stuff the trussed coppa inside; tie off firmly and prick any air pockets with a sterilized needle.
- 6. Hang in a curing chamber at 12–15°C (54–59°F) and 75–80% humidity for 6–10 weeks, until 35–40% weight loss.
- 7. Chill well, slice paper-thin, and serve at cool room temperature on a charcuterie board.
Why You’ll Love This Recipe
- Classic Italian-style coppa with deep wine, garlic, and sweet spice flavor, but made in your own kitchen.
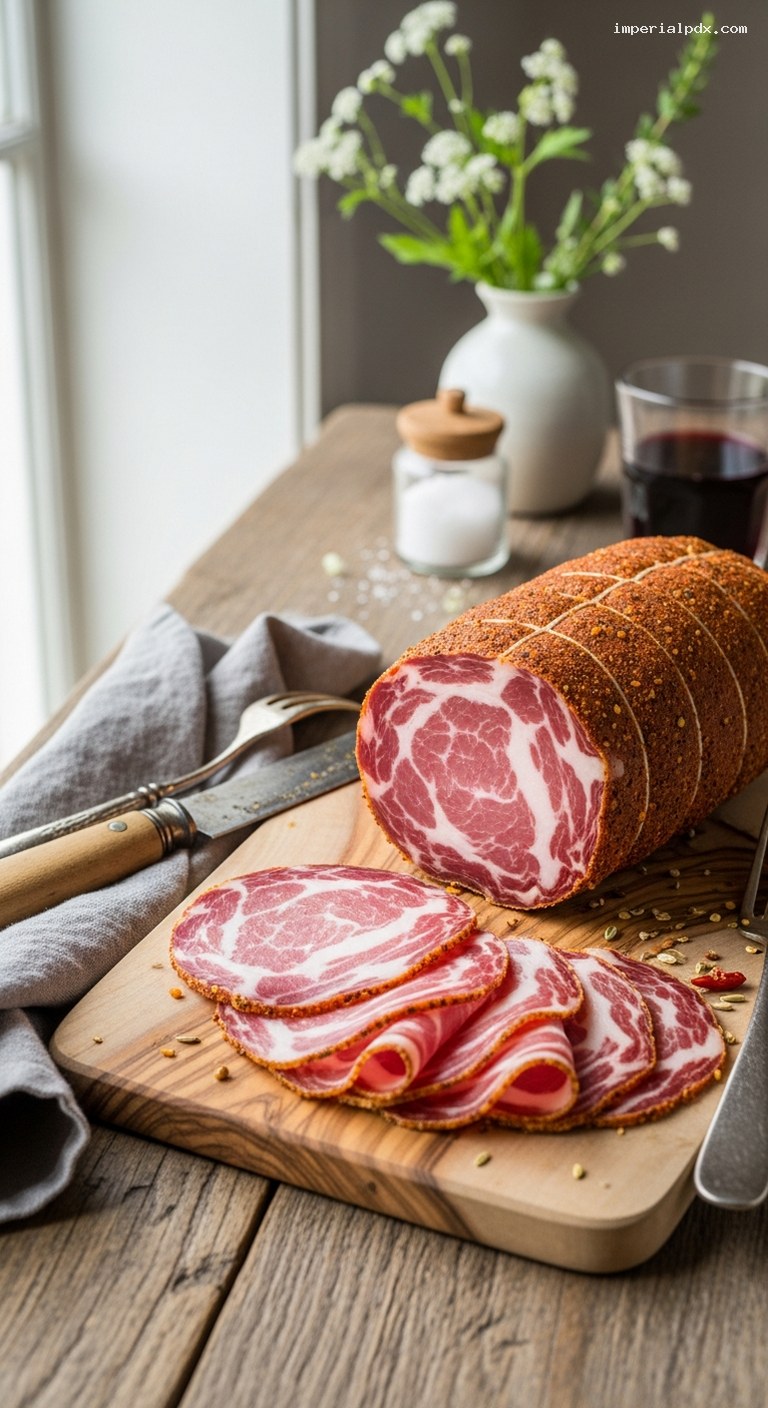
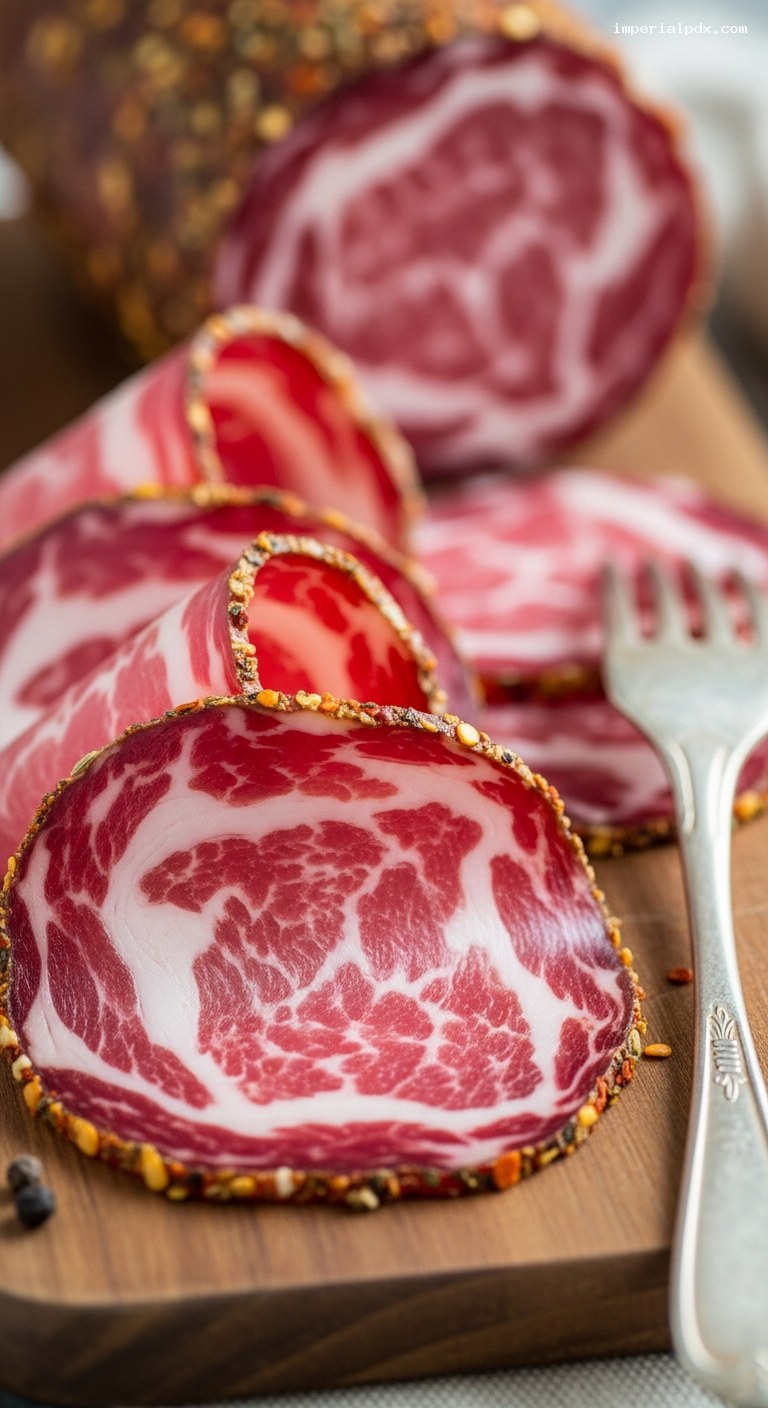
- Beautiful marbled slices: rosy red meat laced with creamy white fat and a gentle warmth from fennel and chili.
- Surprisingly hands-off: a short prep, then time, air, and patience do the rest.
- Perfect centerpiece for a charcuterie board, special dinner, or homemade food gift.
Grocery List
- Produce: 1 head garlic, optional fresh rosemary or thyme, optional lemon (for zesting the cure or serving).
- Dairy: None required.
- Pantry: Pork coppa/neck muscle, natural sea or kosher salt, Cure #2 (Prague Powder #2), granulated sugar, whole black peppercorns, sweet paprika, fennel seeds, crushed red pepper flakes, dry red or white wine, beef bung or large collagen casing, butcher’s twine, optional bay leaves and smoked paprika.
Full Ingredients
Pork & Primary Cure (for about 2 kg / 4.4 lb pork coppa)
- 1 whole pork coppa / collar / neck muscle, about 2 kg (4.4 lb), well-marbled, boneless
- 56 g natural sea salt or kosher salt (2.8% of meat weight)
- 5 g Cure #2 (Prague Powder #2; 0.25% of meat weight, curing salt with nitrite/nitrate, not table salt)
- 20 g granulated sugar (about 1.5 tbsp; 1% of meat weight)
- 4 garlic cloves, finely grated or mashed to a paste
- 120 ml dry red or white wine (1/2 cup), preferably Italian (e.g., Montepulciano, Sangiovese, or an unoaked white)
- 1–2 bay leaves, finely crumbled (optional)
- Optional: finely grated zest of 1/2 lemon or orange, for a brighter aromatic note
Outer Spice Rub
- 10 g freshly ground black pepper (about 1 tbsp)
- 10 g sweet paprika (about 1.5 tbsp; use half hot paprika if you like more heat)
- 5 g fennel seeds, lightly toasted and coarsely crushed (about 2 tsp)
- 2–3 g crushed red pepper flakes (about 1/2–1 tsp), to taste
- 1–2 tsp dried oregano or finely chopped fresh rosemary/thyme (optional)
For Stuffing, Hanging & Curing
- 1 beef bung or large collagen/skinless salumi casing, 60–80 mm diameter
- Kitchen twine / butcher’s twine
- 1 sterilized needle or sausage pricker (for removing air pockets)
- Accurate digital scale (for weighing meat and tracking weight loss)
- Cool, clean hooks or rods for hanging
- Curing chamber capable of 12–15°C (54–59°F) and 75–80% relative humidity (often a modified refrigerator with a controller, small fan, and humidifier)
Food Safety Note: This is a traditional long-cured product. Always use Cure #2 at the specified rate, keep meat refrigerated during the curing phase, and maintain correct temperature and humidity while drying.
Step-by-Step Instructions
Step 1: Select, trim, and weigh the pork coppa
Choose a well-marbled pork coppa (also sold as pork neck, collar, or shoulder cap). Ideally, it should be a single, compact muscle with fine white fat marbling and minimal large external fat deposits.
Pat the meat dry with paper towels. Trim off any glands, loose flaps of meat, thick yellow fat, or ragged edges. Aim for a smooth, log-shaped piece so it will cure and dry evenly. Weigh the trimmed meat accurately in grams and note the weight. This is important both for calculating curing salt (already given for 2 kg) and later for checking weight loss.
If your coppa is significantly lighter or heavier than 2 kg, scale the salt, Cure #2, and sugar amounts by meat weight: salt at 2.8%, Cure #2 at 0.25%, sugar at about 1% of the meat’s weight.
Step 2: Mix the cure and massage it into the meat
In a bowl, combine the sea/kosher salt, Cure #2, sugar, garlic paste, crumbled bay leaf (if using), and wine. Stir until it forms a thick, slushy paste. The salt does not need to fully dissolve.
Place the trimmed coppa in a nonreactive container (glass or food-safe plastic) or a vacuum bag. Pour the curing mixture over the meat and massage it thoroughly into every surface, pressing it into crevices and folds. Any liquid in the bowl should end up in the container with the meat.
Cover the container tightly or seal the bag, pressing out extra air. Label with the date and starting weight of the meat. Place in the coldest part of your refrigerator (1–4°C / 34–39°F).
Step 3: Cure in the refrigerator for 10–14 days
Let the coppa cure in the refrigerator for 10–14 days. Turn the meat once a day, redistributing the brine that forms and ensuring all sides spend time in contact with the curing mixture. The meat will firm up and deepen in color over this time.
For a typical 2 kg coppa, 12 days is a good target: enough time for the cure to reach the center without over-salting. Thinner pieces can be ready closer to 10 days; thicker ones can go to 14. If in doubt, you can slice into the center slightly at the end: the color should be evenly pink all the way through.
Once curing is complete, remove the coppa from the brine. Lightly rinse under cold running water to remove excess surface cure, then pat completely dry with clean towels. Discard the curing liquid.
Step 4: Season the exterior and dry the surface
In a small bowl, mix the black pepper, sweet paprika, crushed fennel seeds, crushed red pepper, and any optional herbs. This blend forms the aromatic outer crust.
Rub the dried coppa all over with the spice mixture, coating every side. Use your hands to press the spices firmly onto the surface so they adhere well. This outer rub gives that classic coppa look and a gentle sweet–savory warmth.
Set the coppa on a rack over a tray and place it in the refrigerator, uncovered, for 12–24 hours. This brief rest helps the surface dry slightly and allows the flavors to settle in, which makes stuffing into the casing easier and reduces the chance of trapped moisture.
Step 5: Truss tightly and stuff into the casing
Soak the beef bung or casing in cool water while you prepare the meat, changing the water once or twice to remove excess salt if it is packed in brine. Rinse the inside by running cool water through it. Let it drain while you tie the coppa.
Using butcher’s twine, truss the coppa very tightly into a compact, even cylinder. Start by tying a loop around one end, then work your way along the length using butcher’s loops or individual knots every 2–3 cm (about 1 inch). The goal is a firm, uniform log without soft, sagging sections.
Carefully feed the trussed coppa into the prepared casing, pushing it all the way to the end. Tie off the open end securely with twine, leaving a strong loop for hanging. Using a sterilized needle or sausage pricker, gently prick the casing wherever you see visible air pockets. This allows trapped air to escape and helps the casing cling closely to the meat.
Step 6: Hang and dry in a controlled curing chamber
Weigh the stuffed coppa (meat plus casing and twine) and record this as your new starting weight. Hang the coppa by its loop in a curing chamber set to:
- Temperature: 12–15°C (54–59°F)
- Humidity: 75–80% relative humidity
- Airflow: Very gentle, not blowing directly on the meat
Allow the coppa to dry for 6–10 weeks. Check weekly: it should slowly lose weight, firm up, and develop a pleasant cured aroma. Weigh it periodically to track progress. Your target is about 35–40% weight loss from the stuffed starting weight. For example, if it weighed 2000 g going into the chamber, aim for 1200–1300 g finished.
Surface mold that is white and powdery is usually normal and even beneficial; brightly colored molds (green, black, orange) should be wiped with a cloth dipped in vinegar, then dried. Adjust humidity if the exterior becomes very hard while the inside still feels soft (this can indicate “case hardening” and usually means humidity is too low or airflow too strong).
Step 7: Check for doneness, chill, slice, and serve
When the coppa has reached 35–40% weight loss and feels firm throughout, remove it from the curing chamber. Carefully cut away the outer string and casing. The surface may have a slightly tacky or dry feel; this is normal.
Wrap the coppa tightly in parchment and then plastic wrap, or vacuum-seal it, and chill in the refrigerator for at least 12 hours before slicing. Chilling helps you slice it very thinly.
To serve, use a sharp slicing knife or meat slicer to cut paper-thin slices across the grain. The interior should be a deep rosy red with a beautiful web of white fat, and the aroma gently garlicky, with fennel, wine, and warm spice. Serve at cool room temperature on a wooden board with crusty bread, olives, sharp cheese, pickles, and a glass of wine. Thin slices will melt on the tongue and show off the delicate spice warmth and natural sweetness of the pork.
Pro Tips
- Weigh everything: Use a digital scale for both meat and cures. Accurate percentages are crucial for food safety and consistent flavor.
- Track weight loss: Write down the starting stuffed weight and check every week. Aim for 35–40% weight loss; this is more reliable than going by time alone.
- Control humidity: Too dry and the outside hardens before the inside is ready; too damp and you risk spoilage. A small humidifier/dehumidifier and a hygrometer in a modified fridge work well.
- Avoid strong drafts: Gentle air circulation is good, but direct fan blasts can cause case hardening and uneven drying.
- Slice just before serving: Coppa is best when sliced to order; thin slices at cool room temperature taste richer and more aromatic than slices held in the fridge for hours.
Variations
- Calabrian-style heat: Use half sweet and half hot paprika, add extra crushed red pepper, and include a little crushed Calabrian chili in the cure for a spicier profile.
- Herb and citrus coppa: Add fresh chopped rosemary, thyme, and lemon or orange zest to the cure, and use a black pepper and herb-focused outer rub instead of paprika.
- Smoky accent: Replace 1–2 teaspoons of the sweet paprika with smoked paprika for a gentle, natural-tasting smokiness without actual smoking.
Storage & Make-Ahead
Once fully dried and trimmed of its casing, coppa should be tightly wrapped in parchment and then plastic wrap, or vacuum-sealed. Store in the refrigerator for up to 3–4 weeks without noticeable loss of quality. For longer storage, freeze whole or in large chunks, well-wrapped or vacuum-sealed, for up to 6 months; thaw slowly in the refrigerator before slicing.
Because this is a cured product, the timeline is naturally “make-ahead.” You can start a coppa 2–3 months before a holiday, celebration, or special dinner. If you plan to serve only a portion, cut off what you need, rewrap the remainder tightly, and return it to the refrigerator. Try to minimize repeated warming and cooling cycles; slice what you need and keep the rest chilled.
Nutrition (per serving)
Approximate values per 30 g (about 4–5 very thin slices): 110–130 calories; 9–10 g fat; 7–8 g protein; 1 g carbohydrates; 0 g fiber; 25–35 mg cholesterol; 400–550 mg sodium. Values will vary depending on exact fat content of the meat and final salt concentration after curing and drying.