Quick Recipe Version (TL;DR)
Quick Ingredients
- 1 1/2 lb (680 g) sashimi-grade ahi tuna, cut into 4 thick blocks
- 1 1/2 tsp kosher salt, 3/4 tsp black pepper, 2 tbsp soy sauce, 1 tsp sesame oil
- 3/4 cup all-purpose flour, 2 large eggs, 1 1/2 cups panko breadcrumbs
- 4 cups neutral frying oil (canola, vegetable, or peanut)
- 4 cups hot cooked short-grain white rice
- Wasabi mayo: 1/4 cup mayo, 1–2 tsp wasabi paste, 1 tsp rice vinegar, 1/2 tsp soy, 1/2 tsp sugar
- Tonkatsu sauce: 3 tbsp ketchup, 2 tbsp Worcestershire, 1 tbsp soy, 1 tbsp mirin
- Lemon wedges, sliced green onion, sesame seeds, optional furikake/nori for garnish
Do This
- 1. Cook rice and keep warm. Whisk together wasabi mayo ingredients in a small bowl. Whisk tonkatsu sauce ingredients in another bowl; set both aside.
- 2. Pat ahi dry. Cut into 4 thick blocks (about 1 1/2 inches). Season with salt, pepper, soy sauce, and sesame oil. Let sit 10 minutes.
- 3. Set up a breading station: seasoned flour in one dish, beaten eggs in another, panko in a third.
- 4. Dredge tuna blocks in flour, dip in egg, then press into panko to fully coat. Chill 5 minutes while oil heats.
- 5. Heat oil in a deep pot to 350°F (175°C). Fry ahi 45–60 seconds per side until panko is golden but center still rare. Drain on a rack.
- 6. Slice ahi into 1/2-inch pieces. Serve over bowls of rice with tonkatsu sauce, wasabi-mayo drizzle, lemon wedges, green onion, sesame seeds, and optional furikake.
Why You’ll Love This Recipe
- Crispy, golden panko crust on the outside with a silky, rare ahi center inside.
- Classic local-style flavors: bright lemon, savory tonkatsu sauce, and a zippy wasabi-mayo drizzle.
- Fast enough for a weeknight but impressive enough for guests.
- Built-in meal: the sliced ahi is served right over hot rice for a complete bowl.
Grocery List
- Produce: 1 lemon, green onions (scallions), optional: nori sheet, fresh herbs, or microgreens for garnish
- Dairy: None required (mayonnaise is shelf-stable or refrigerated condiment)
- Pantry: 1 1/2 lb sashimi-grade ahi tuna, short-grain white rice, all-purpose flour, eggs, panko breadcrumbs, neutral frying oil, soy sauce, toasted sesame oil, wasabi paste, rice vinegar, ketchup, Worcestershire sauce, mirin, sugar, Dijon or Japanese mustard (optional), salt, black pepper, sesame seeds, optional furikake
Full Ingredients
Ahi and Seasoning
- 1 1/2 lb (680 g) sashimi-grade ahi tuna loin, cut into 4 thick blocks (about 1 1/2 inches / 4 cm thick)
- 1 tsp kosher salt
- 1/2 tsp freshly ground black pepper
- 1 tbsp soy sauce
- 1 tsp toasted sesame oil (optional but delicious)
Panko Crust and Frying
- 3/4 cup (95 g) all-purpose flour
- 1/2 tsp kosher salt
- 1/4 tsp freshly ground black pepper
- 2 large eggs
- 1 tbsp water
- 1 1/2 cups (about 90 g) panko breadcrumbs
- 4 cups (960 ml) neutral oil for frying (canola, vegetable, or peanut oil)
Wasabi Mayo Drizzle
- 1/4 cup (60 g) Japanese-style mayonnaise (such as Kewpie) or regular mayonnaise
- 1–2 tsp prepared wasabi paste, to taste
- 1 tsp rice vinegar
- 1/2 tsp soy sauce
- 1/2 tsp sugar
Quick Tonkatsu Sauce
- 3 tbsp ketchup
- 2 tbsp Worcestershire sauce
- 1 tbsp soy sauce
- 1 tbsp mirin (or 1 tbsp sugar mixed with 1 tsp water, if you do not have mirin)
- 1 tsp Dijon or Japanese mustard (optional, for a subtle kick)
For Serving
- 4 cups hot cooked short-grain white rice (from about 2 cups uncooked rice)
- 1 lemon, cut into wedges
- 2 tbsp thinly sliced green onions (scallions)
- 1 tsp toasted sesame seeds
- 1 sheet nori, cut into thin strips (optional)
- Furikake seasoning, for sprinkling (optional but very tasty)
Step-by-Step Instructions
Step 1: Cook the Rice and Make the Sauces
Start by cooking the rice according to the package directions so it is ready and hot when the fish comes out of the oil. Short-grain white rice is traditional; rinse it until the water runs mostly clear, then cook and keep warm, covered.
While the rice cooks, make the sauces. For the wasabi mayo, whisk together the mayonnaise, 1 tsp wasabi paste, rice vinegar, soy sauce, and sugar in a small bowl until smooth. Taste and add up to 1 more teaspoon of wasabi if you like more heat. Cover and refrigerate until serving.
For the tonkatsu sauce, whisk the ketchup, Worcestershire sauce, soy sauce, mirin, and mustard (if using) in another small bowl until glossy and well combined. Adjust to taste: add a pinch of sugar if you prefer it sweeter or a splash more Worcestershire for more tang. Set both sauces aside.
Step 2: Portion and Season the Ahi
Pat the ahi thoroughly dry with paper towels. This helps the seasoning stick and keeps the oil from splattering. Cut the tuna loin into 4 evenly sized rectangular blocks, about 1 1/2 inches (4 cm) thick. Try to keep the pieces similar in size so they cook at the same rate.
Lightly season all sides of the tuna blocks with the salt and pepper. Place them in a shallow dish and drizzle with the soy sauce and sesame oil. Turn gently to coat. Let the seasoned ahi rest at room temperature for about 10 minutes while you set up the breading station. This brief rest allows the flavors to soak in and helps take the chill off the fish for more even cooking.
Step 3: Set Up the Breading Station
You will be using a classic three-step breading method. In a shallow dish, whisk together the flour, 1/2 tsp kosher salt, and 1/4 tsp pepper. This seasoned flour forms the base layer that helps the egg cling to the tuna.
In a second shallow dish, beat the eggs with 1 tbsp water until smooth and slightly frothy. In a third dish, add the panko breadcrumbs and spread them into an even layer. Line a small tray or plate with parchment paper for the breaded pieces. Having everything ready before you start keeps the process clean and easy.
Step 4: Bread the Ahi Blocks
Working with one piece of tuna at a time, lightly dredge it in the seasoned flour, coating all sides and shaking off any excess. Next, dip it into the beaten egg, turning to cover completely and letting the extra drip back into the dish.
Finally, place the tuna block into the panko. Press gently but firmly so the breadcrumbs adhere to every surface, including the ends. You want a generous, even coat for maximum crunch. Transfer the breaded piece to the prepared tray. Repeat with the remaining tuna. Once all the pieces are coated, refrigerate them for about 5 minutes while you heat the oil; this helps the crust set and stay on during frying.
Step 5: Heat the Oil for Flash-Frying
Pour the oil into a deep, heavy-bottomed pot or high-sided skillet, aiming for about 2 inches (5 cm) of depth. Attach a thermometer to the side if you have one. Heat the oil over medium to medium-high heat until it reaches 350°F (175°C).
If you do not have a thermometer, drop in a few panko crumbs; they should sizzle immediately and slowly turn golden within about 30 seconds. Keep the heat adjusted so the oil stays close to 350°F. Too cool and the crust will soak up oil; too hot and the panko will burn before the interior is warmed through.
Step 6: Fry the Ahi Katsu (Keep the Center Rare)
Carefully lower 1–2 breaded tuna blocks into the hot oil, being careful not to crowd the pot. Fry for about 45–60 seconds per side, turning with tongs, until the panko is evenly golden brown. The goal is a crisp crust while leaving the center rare to medium-rare.
As soon as the outside is nicely browned, remove the ahi katsu to a wire rack set over a tray or a plate lined with paper towels. Do not overcook; the fish will continue to warm slightly from residual heat. Repeat with the remaining pieces, letting the oil recover to 350°F between batches if needed.
Step 7: Slice and Build the Bowls
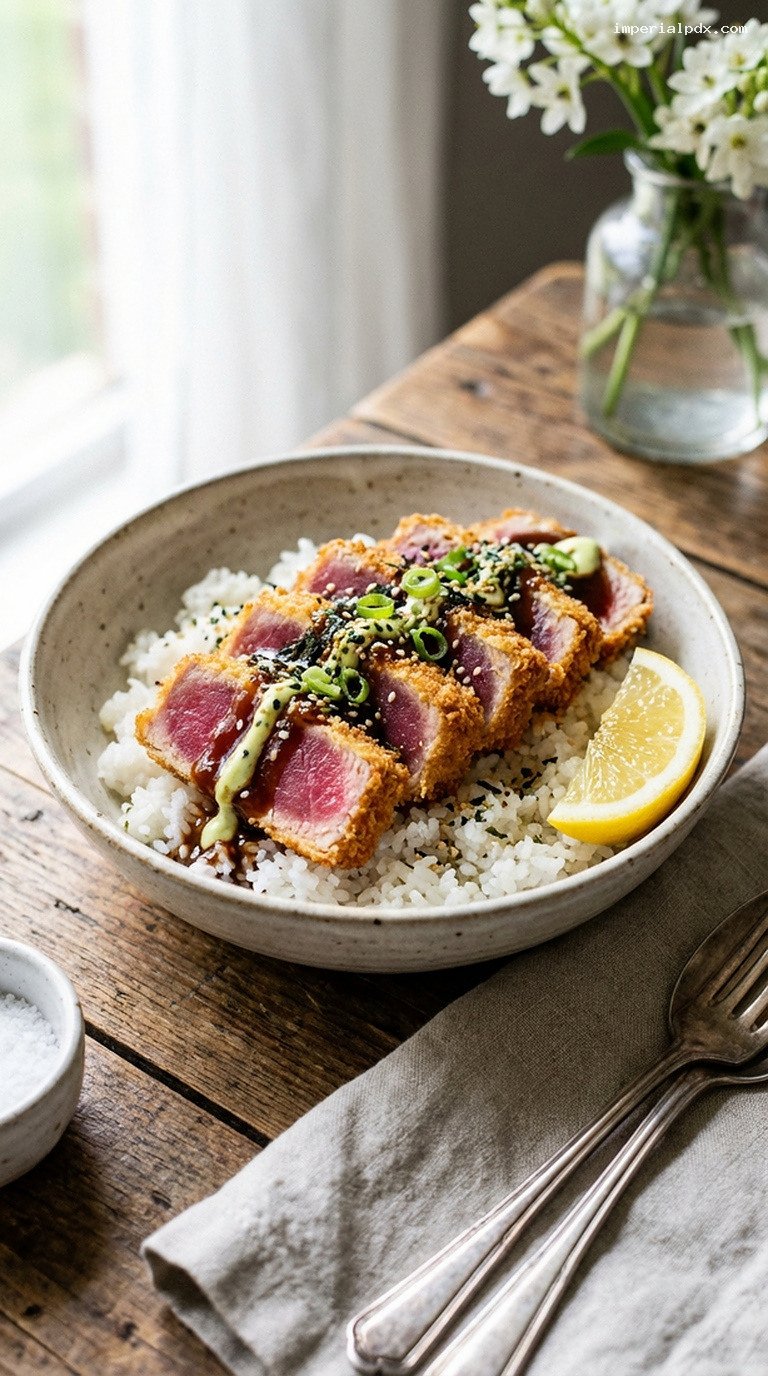
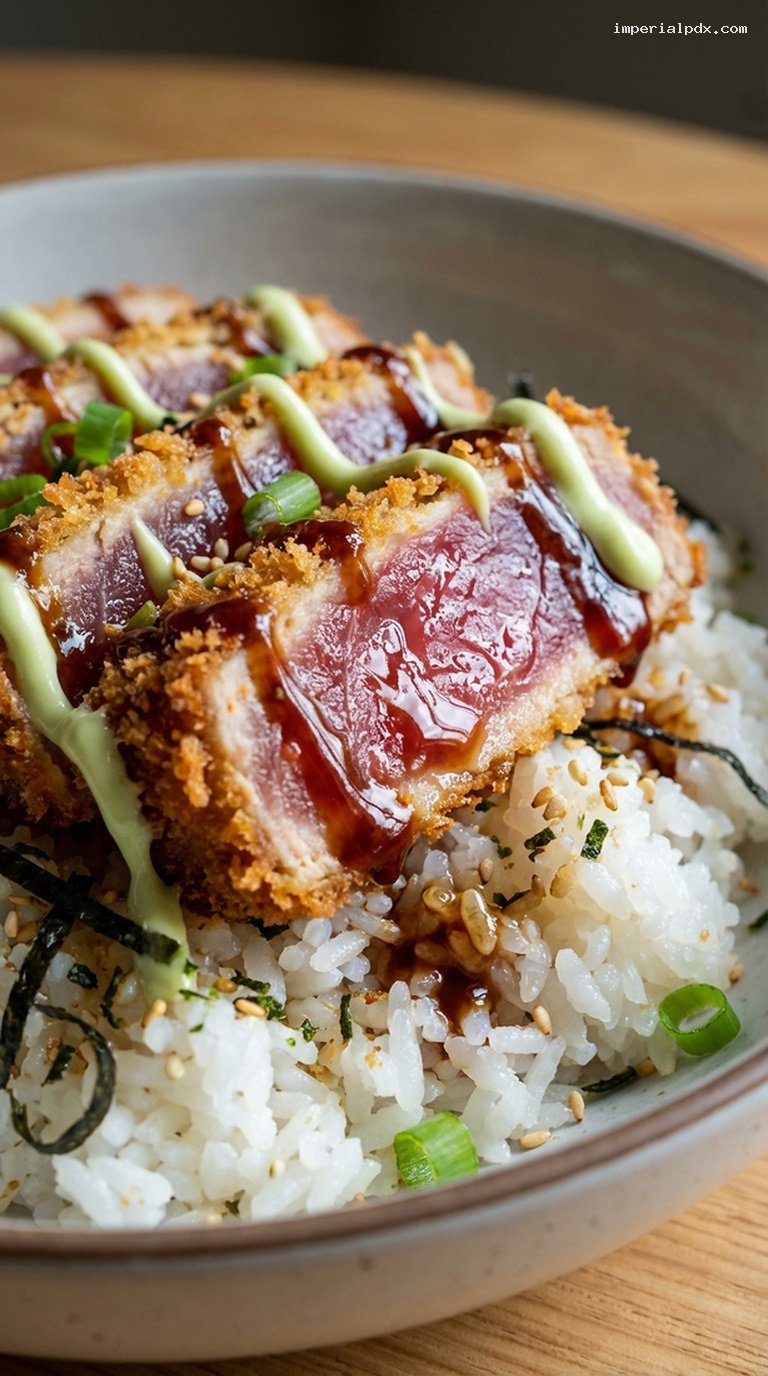
Let the fried ahi blocks rest for 2–3 minutes. This short rest keeps the juices in and makes slicing easier. Using a very sharp knife, slice each block crosswise into 1/2-inch (1.25 cm) thick pieces. You should see a beautiful contrast: a crisp, golden crust around a ruby-rare center.
To serve, scoop about 1 cup of hot rice into each bowl. Fan the slices of ahi katsu over the rice. Generously drizzle with tonkatsu sauce, then zigzag the wasabi mayo on top. Finish with a squeeze of fresh lemon, a sprinkle of green onions and sesame seeds, and optional furikake or nori strips. Serve immediately with extra lemon and sauces on the side.
Pro Tips
- Use sashimi-grade ahi: Because the center stays rare, start with very fresh, high-quality tuna from a trusted source.
- Keep the oil hot and steady: Fry at 350°F (175°C) for the crispiest crust; work in small batches so the temperature does not drop.
- Do not overcook: Aim for 45–60 seconds per side. If you are unsure, err on the side of less time; you can always give it a few extra seconds if needed.
- Chill briefly after breading: A 5–10 minute chill helps the panko cling tightly, so it does not fall off in the oil.
- Use a very sharp knife for slicing: A clean, sharp blade keeps the panko crust intact and gives neat, beautiful slices.
Variations
- Spicy Ahi Katsu: Add extra wasabi or a teaspoon of sriracha to the mayo, and sprinkle the finished dish with thinly sliced fresh chili or shichimi togarashi for a spicier kick.
- Baked or Air-Fryer Katsu: For a lighter version, spray the breaded tuna lightly with oil and bake at 425°F (220°C) for 6–8 minutes or air-fry at 400°F (200°C) for about 5–7 minutes, watching closely to keep the center pink.
- Poke-Style Bowl Twist: Serve the sliced ahi katsu over rice with pickled ginger, cucumber, avocado, and a sprinkle of furikake to blend the feel of a poke bowl with katsu crunch.
Storage & Make-Ahead
Ahi katsu is best enjoyed immediately, while the crust is crisp and the center is still rare and silky. Because the fish is only lightly cooked, leftovers are not ideal for long storage. If you must store leftovers, cool completely, then refrigerate them in an airtight container for up to 1 day. Reheat gently in a 375°F (190°C) oven or air fryer just until the exterior re-crisps; the center will cook further and become more medium to well-done.
You can, however, prep components in advance: cook the rice and keep it warm in a rice cooker, mix both sauces up to 2 days ahead and refrigerate, and cut and season the tuna up to 2 hours ahead (keep tightly covered and chilled). Bread the tuna up to 1 hour before frying and keep it refrigerated until you are ready to cook.
Nutrition (per serving)
Approximate values per serving (1/4 of the recipe, including rice, sauces, and garnishes): about 700–750 calories, 40–45 g protein, 65–75 g carbohydrates, 28–34 g fat, 4–6 g fiber, and 1,400–1,700 mg sodium. Actual values will vary based on exact ingredients, portion sizes, and how much sauce you use.