Quick Recipe Version (TL;DR)
Quick Ingredients
- 2 boneless rabbit loins, trimmed (about 400 g / 14 oz total)
- 10 g kosher salt (2.5% of meat weight)
- 6 g granulated sugar (1.5% of meat weight)
- 1 g pink curing salt #1 (0.25% of meat weight, optional but recommended)
- 6 juniper berries, lightly crushed
- 2 tsp fresh thyme leaves, chopped
- 1 tsp finely grated lemon zest
- 1 tsp finely grated orange zest
- 1/2 tsp freshly ground black pepper
- Extra-virgin olive oil, flaky sea salt, extra citrus zest and thyme for serving
Do This
- 1. Trim rabbit loins of silverskin. Weigh meat, then calculate salt, sugar, and (if using) pink curing salt based on the weight.
- 2. Mix salts, sugar, juniper, thyme, citrus zests, and pepper. Rub all over loins, pressing cure into every surface.
- 3. Place loins in a zip-top bag in a single layer, seal, and refrigerate 24–36 hours, turning the bag every 8–12 hours.
- 4. Rinse off cure under cold water, pat very dry, then tie loins into a neat cylinder with butcher’s twine.
- 5. Place on a wire rack over a tray and air-dry uncovered in the coldest part of the fridge (1–4°C / 34–39°F) for 3–4 days, turning daily, until firm and about 20–25% lighter.
- 6. Before serving, chill well, remove twine, and slice medallions as thin as you can with a very sharp knife.
- 7. Drizzle with olive oil, sprinkle with flaky salt, extra zest, and thyme. Serve with crusty bread or crackers.
Why You’ll Love This Recipe
- Turns lean rabbit loin into an elegant, silky, charcuterie-style treat.
- Bright juniper, thyme, and citrus give clean, aromatic flavors instead of heavy smokiness.
- Mostly hands-off: a few short prep moments over several days do all the magic.
- Perfect make-ahead appetizer that looks restaurant-level but is absolutely doable at home.
Grocery List
- Produce: 1 lemon, 1 orange, fresh thyme, optional fresh herbs or microgreens for garnish.
- Dairy: None required.
- Pantry: Boneless rabbit loins (from butcher or freezer section), kosher salt, granulated sugar, pink curing salt #1 (optional but recommended), juniper berries, black peppercorns, extra-virgin olive oil, flaky sea salt, crusty bread or crackers (for serving).
Full Ingredients
For the cured rabbit loins
- 2 boneless rabbit loins, well-trimmed of silverskin and fat (about 400 g / 14 oz total)
- 10 g kosher salt (2.5% of the meat weight)
- 6 g granulated sugar (1.5% of the meat weight)
- 1 g pink curing salt #1 (0.25% of the meat weight, optional but recommended for color and safety)
- 6 juniper berries, lightly crushed
- 2 tsp fresh thyme leaves, finely chopped
- 1 tsp finely grated lemon zest (from about 1/2 lemon)
- 1 tsp finely grated orange zest (from about 1/2 orange)
- 1/2 tsp freshly ground black pepper
For serving (optional but recommended)
- 1–2 tbsp extra-virgin olive oil, for drizzling
- Flaky sea salt, to finish
- Extra lemon and orange zest, very finely grated
- A few extra thyme sprigs or other soft herbs (tarragon, chervil, or chives)
- Crusty bread or mild crackers
- Pickled vegetables or cornichons, to serve alongside (optional)
Step-by-Step Instructions
Step 1: Trim and weigh the rabbit loins
Pat the rabbit loins dry with paper towels. Using a sharp knife, carefully trim away any silverskin (the thin, shiny connective tissue) and any obvious bits of fat. You want a smooth, even surface so the cure can penetrate evenly and the finished medallions slice cleanly.
Place the trimmed loins on a digital scale and note the total weight in grams. This number is important: you will calculate the amounts of salt, sugar, and pink curing salt (if using) as a percentage of this weight. For example, if your loins weigh 400 g, you will need 10 g kosher salt, 6 g sugar, and 1 g pink curing salt #1.
Step 2: Mix the aromatic curing blend
In a small bowl, combine the kosher salt, sugar, and pink curing salt #1 (if using). Stir well so the curing salt is evenly dispersed; you do not want any concentrated spots.
Add the crushed juniper berries, chopped thyme, lemon zest, orange zest, and freshly ground black pepper. Use your fingers to rub the zest and herbs into the salt mixture until it smells very fragrant. This helps release the aromatic oils so they infuse the meat more efficiently.
Step 3: Rub and cure the loins in the fridge
Place the rabbit loins on a plate or tray. Sprinkle the curing mixture evenly over all sides, then gently but firmly rub it in, making sure every surface is coated. Press some of the aromatics onto the meat so they adhere.
Transfer the loins and any remaining cure into a small, food-safe container or a zip-top bag. Arrange the loins in a single layer. If using a bag, press out as much air as possible before sealing.
Refrigerate for 24–36 hours, keeping the temperature between 1–4°C (34–39°F). Turn the loins or flip the bag every 8–12 hours to redistribute the cure. Over this time the meat will firm slightly and release some liquid; that is normal and part of the curing process.
Step 4: Rinse, dry, and shape into a neat log
After 24–36 hours, the loins should feel noticeably firmer. Remove them from the curing container and rinse briefly under cold running water to remove excess salt and aromatics.
Pat the loins very dry with plenty of paper towels. This drying step is important: moisture left on the surface can encourage unwanted bacteria and slows down the drying phase.
To get tidy, round medallions, line up the loins end to end, overlapping slightly if they are short, and use butcher’s twine to tie them into a tight cylinder about 3–4 cm (1 1/4–1 1/2 inches) thick. Tie a loop of twine every 2–3 cm (about 1 inch) along the length and pull snugly to even out the shape. You want a firm, compact log without air pockets.
Step 5: Air-dry in the fridge until firm and silky
Set a wire rack over a small tray or baking sheet to catch drips. Place the tied rabbit loin log on the rack. Air circulation is key here; the rack lets air reach all sides so the loin dries evenly.
Place the rack, uncovered, in the coldest part of your refrigerator (ideally 1–4°C / 34–39°F). Let the loin air-dry for 3–4 days. Turn the log once a day so all sides are exposed to the cool, dry air.
For the most precise result, weigh the loin after patting it dry and again each day. When it has lost about 20–25% of its post-rinse weight and feels firm but still slightly springy in the center, it is ready. The surface should look dry and matte, with no slimy spots or off smells. If anything smells sour or strange, discard it.
Step 6: Chill, slice, and admire those whisper-thin medallions
For the cleanest slices, place the cured loin in the freezer for 15–20 minutes before cutting. It should feel very cold and just barely starting to firm at the edges, but not rock-solid frozen.
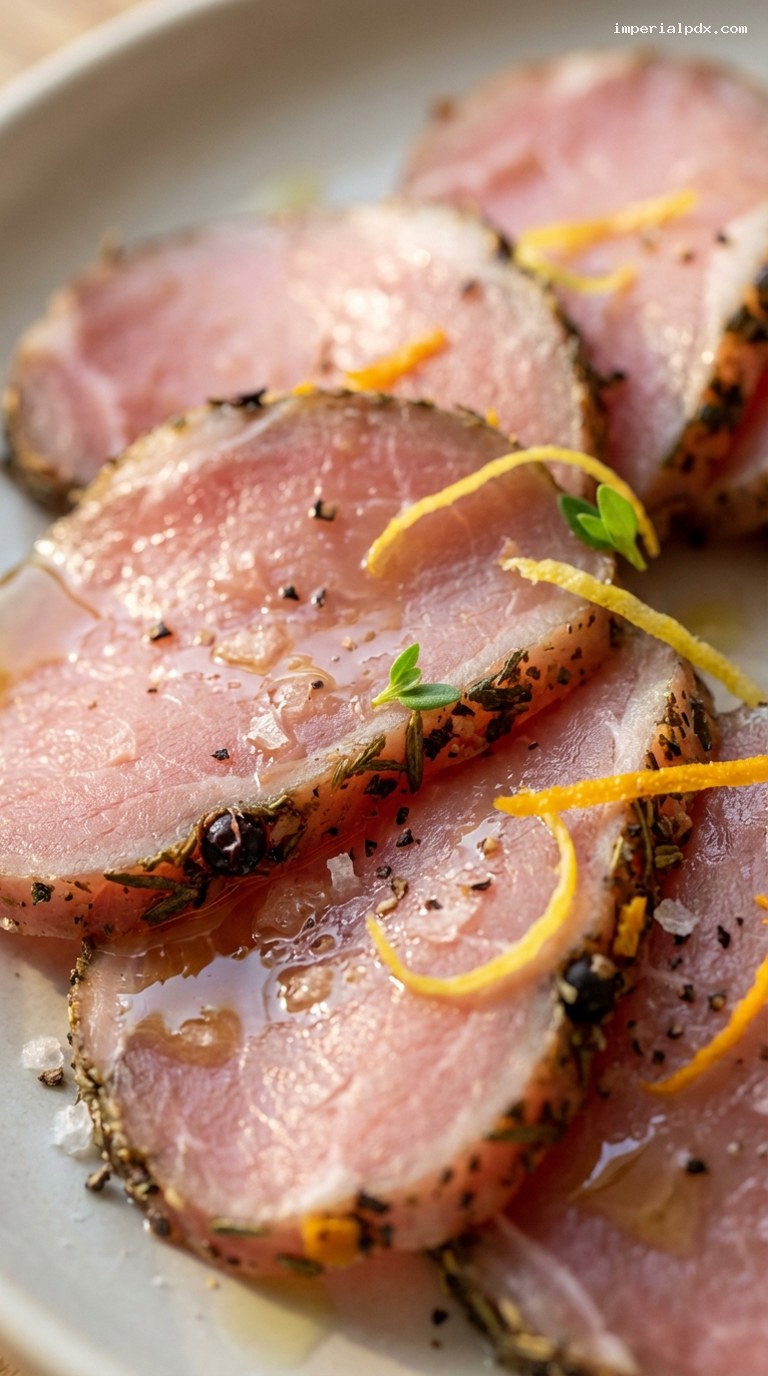
Remove the twine. Using your sharpest slicing knife, slice the loin crosswise into very thin medallions, aiming for 1–2 mm (about 1/16 inch) thick. Take your time and let the knife do the work. You should see a pale pink, lean interior with a slightly darker, seasoned edge from the cure.
If your knife is dragging, wipe the blade and chill the meat again briefly. Thin slices are what give this its luxurious, melt-in-the-mouth feel.
Step 7: Plate and serve like a little charcuterie jewel
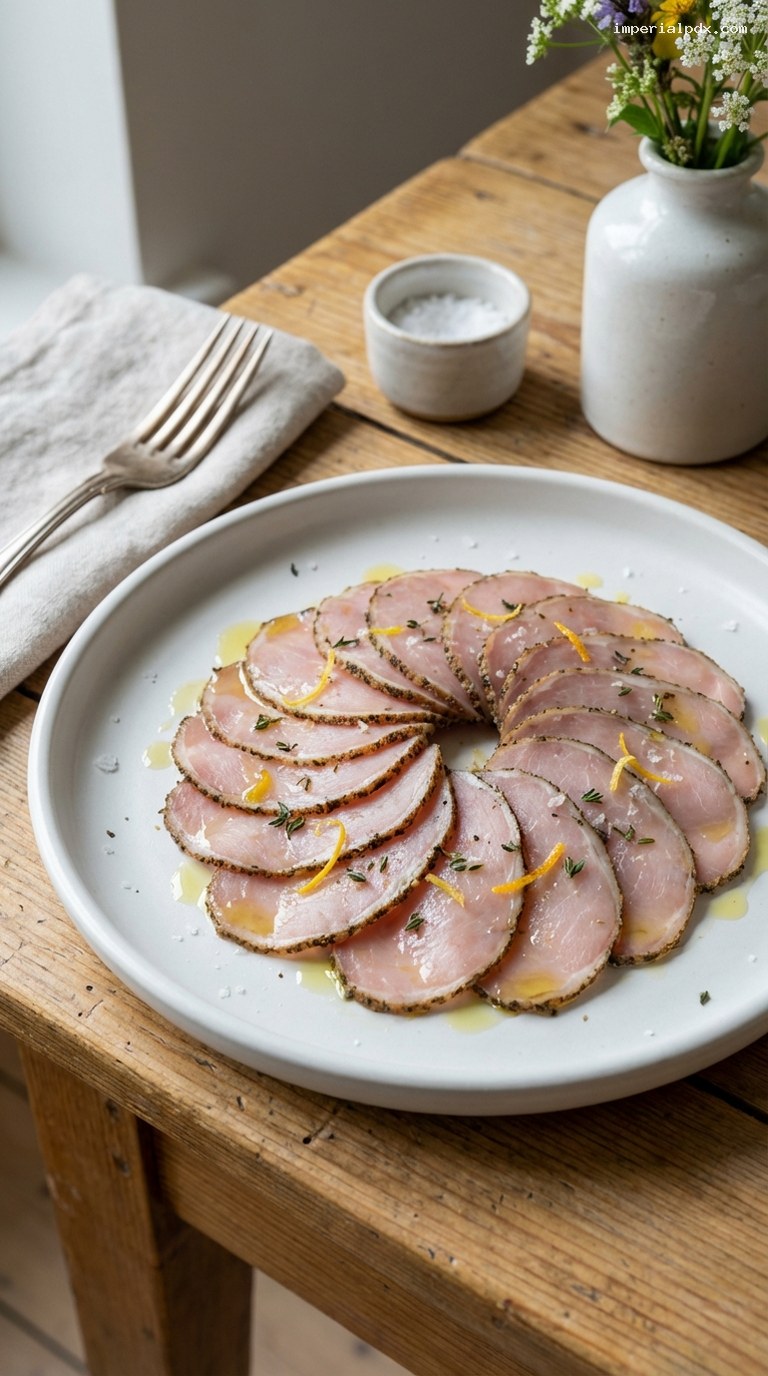
Arrange the medallions in overlapping shingled rows or a loose circular fan on a chilled plate or wooden board. Drizzle lightly with extra-virgin olive oil so they glisten.
Finish with a pinch of flaky sea salt, a scattering of very finely grated lemon and orange zest, and a few small thyme leaves or soft herb sprigs. Serve with slices of warm crusty bread or neutral crackers so the delicate flavor of the rabbit remains the star.
Keep the plate chilled until just before serving, and return any leftovers to the fridge promptly. Remember that this is a cured-but-not-shelf-stable product; it should always be kept cold.
Pro Tips
- Use a scale: Measuring salt and sugar as a percentage of the meat weight gives consistent, safe, and perfectly seasoned results.
- Keep everything cold: Work with well-chilled meat and cure, and always cure and dry at refrigerator temperatures (1–4°C / 34–39°F) for safety.
- Dry thoroughly before hanging: The better you pat the loins dry after rinsing, the more evenly and cleanly they will air-dry in the fridge.
- Sharpen your knife: A long, very sharp slicing or carving knife makes it much easier to get those elegant, transparent-thin slices.
- Watch for warning signs: If at any point you notice an unpleasant odor, slime, or fuzzy mold, discard the meat. When in doubt, throw it out.
Variations
- Garlic & rosemary version: Replace the thyme with 1 tsp finely chopped rosemary and add 1 small grated garlic clove to the cure. This gives a more rustic, earthy flavor that pairs well with olives and robust bread.
- Spiced citrus & fennel: Add 1/2 tsp lightly crushed fennel seeds and a small pinch (1/8 tsp) red pepper flakes to the cure. Keep the citrus zest the same for a fragrant, slightly spicy twist.
- Mild, no-pink-salt take: If you prefer to skip pink curing salt #1, keep the rabbit scrupulously cold, shorten the air-drying to 1–2 days in the fridge, and plan to eat it within 2 days of slicing. The flavor will be slightly paler and more “fresh” tasting, not as cured-meat-like.
Storage & Make-Ahead
Once the rabbit loin has cured and air-dried in the fridge, wrap it tightly in parchment or wax paper and then in foil, or vacuum-seal if you have a sealer. Store in the refrigerator for up to 5 days before slicing. For best quality, slice just before serving rather than in advance; thin slices can dry out quickly.
Sliced leftovers should be covered tightly and refrigerated, and are best eaten within 1–2 days. If you want to keep the cured whole loin longer, freeze it (well-wrapped) for up to 2 months. Thaw overnight in the refrigerator before slicing. Always keep the meat cold, and discard it if you notice any off smells, discoloration, or sliminess.
Nutrition (per serving)
Approximate values per serving (about 45 g / 1.6 oz cured rabbit, without olive oil or bread): 90 calories; 18 g protein; 2 g fat; 1 g carbohydrates; 0 g fiber; 0 g sugar; approximately 600–700 mg sodium. Actual values will vary based on the exact size of the loins, how much moisture is lost during drying, and how much finishing salt and oil you use.