Quick Recipe Version (TL;DR)
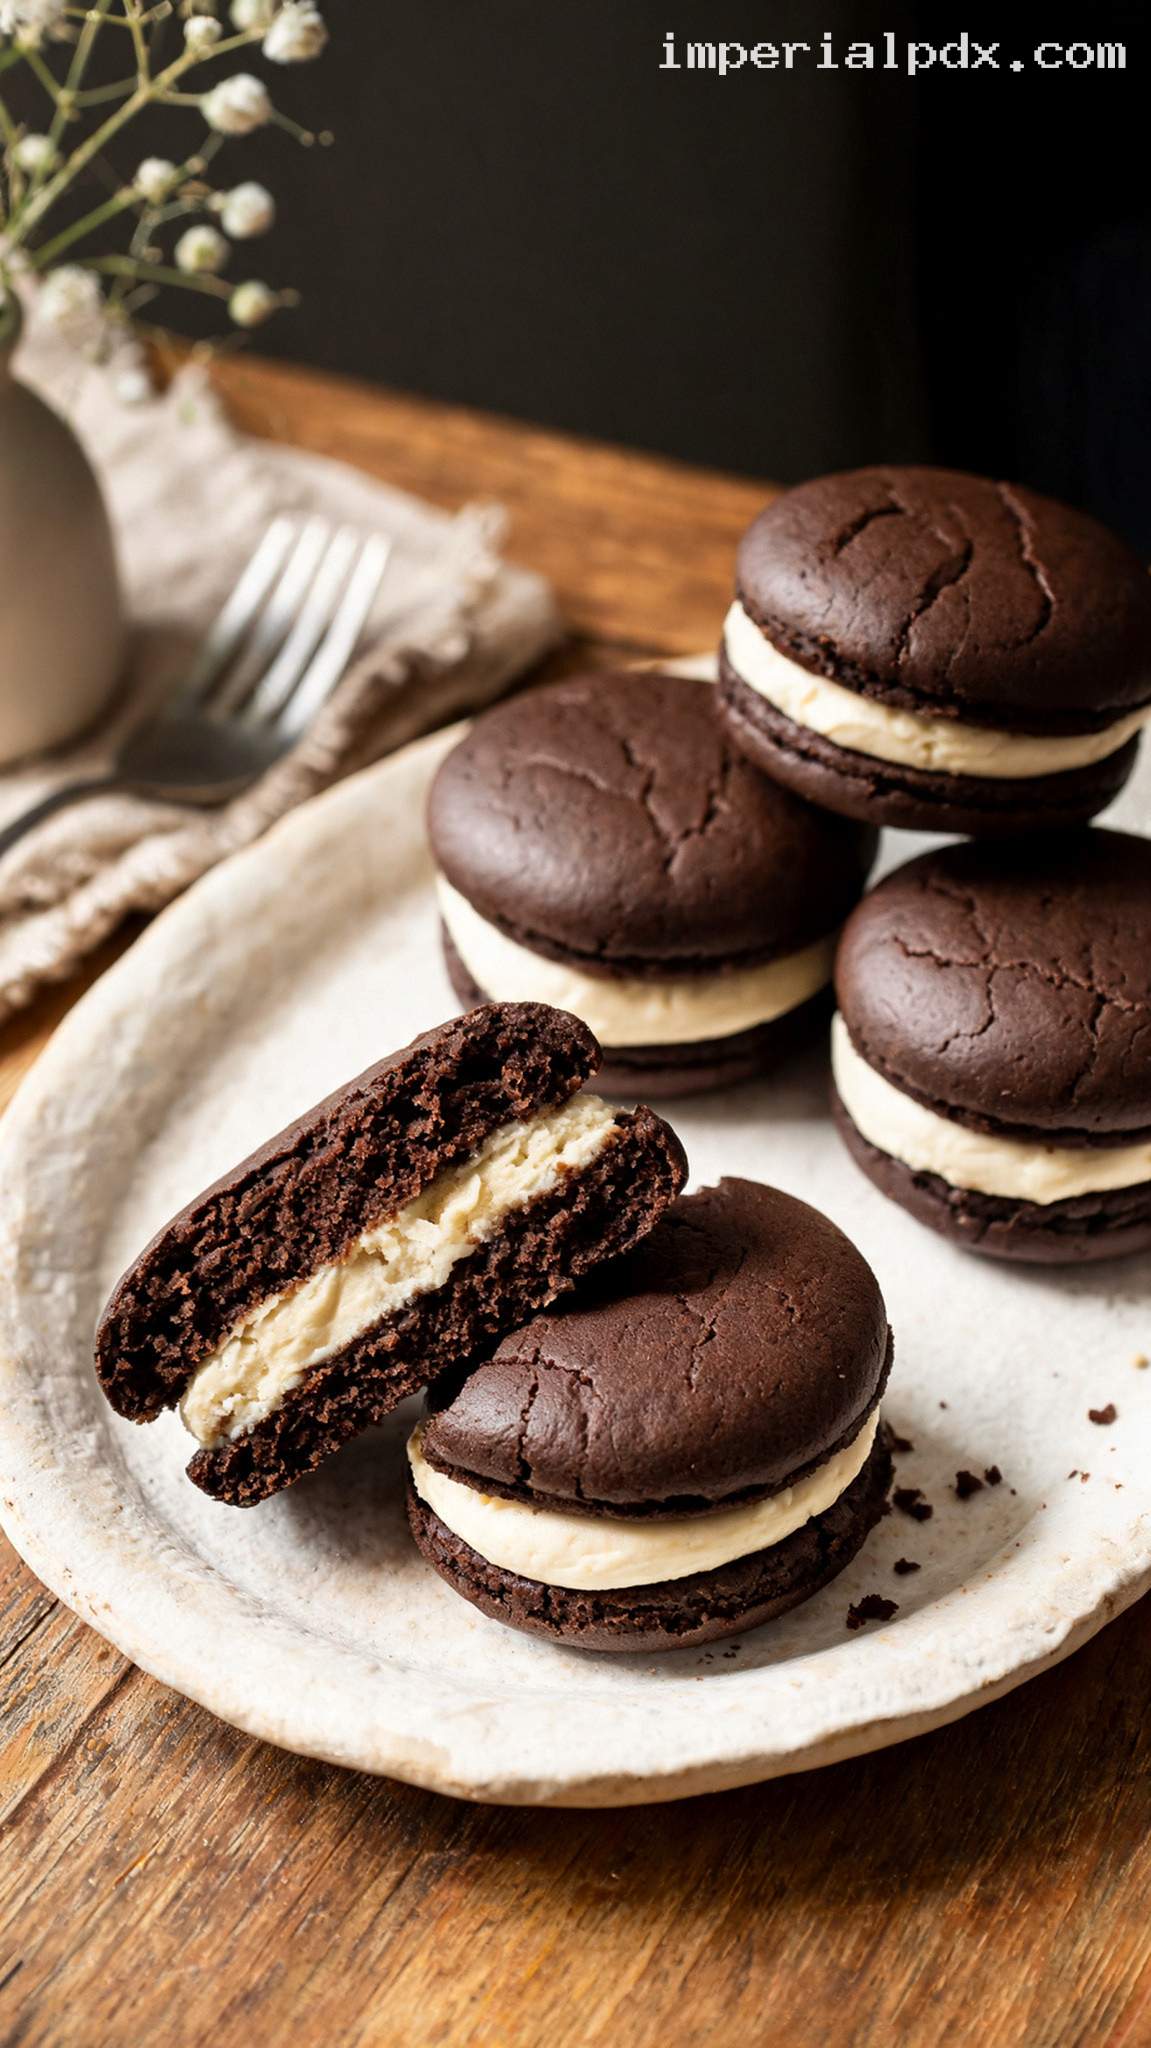
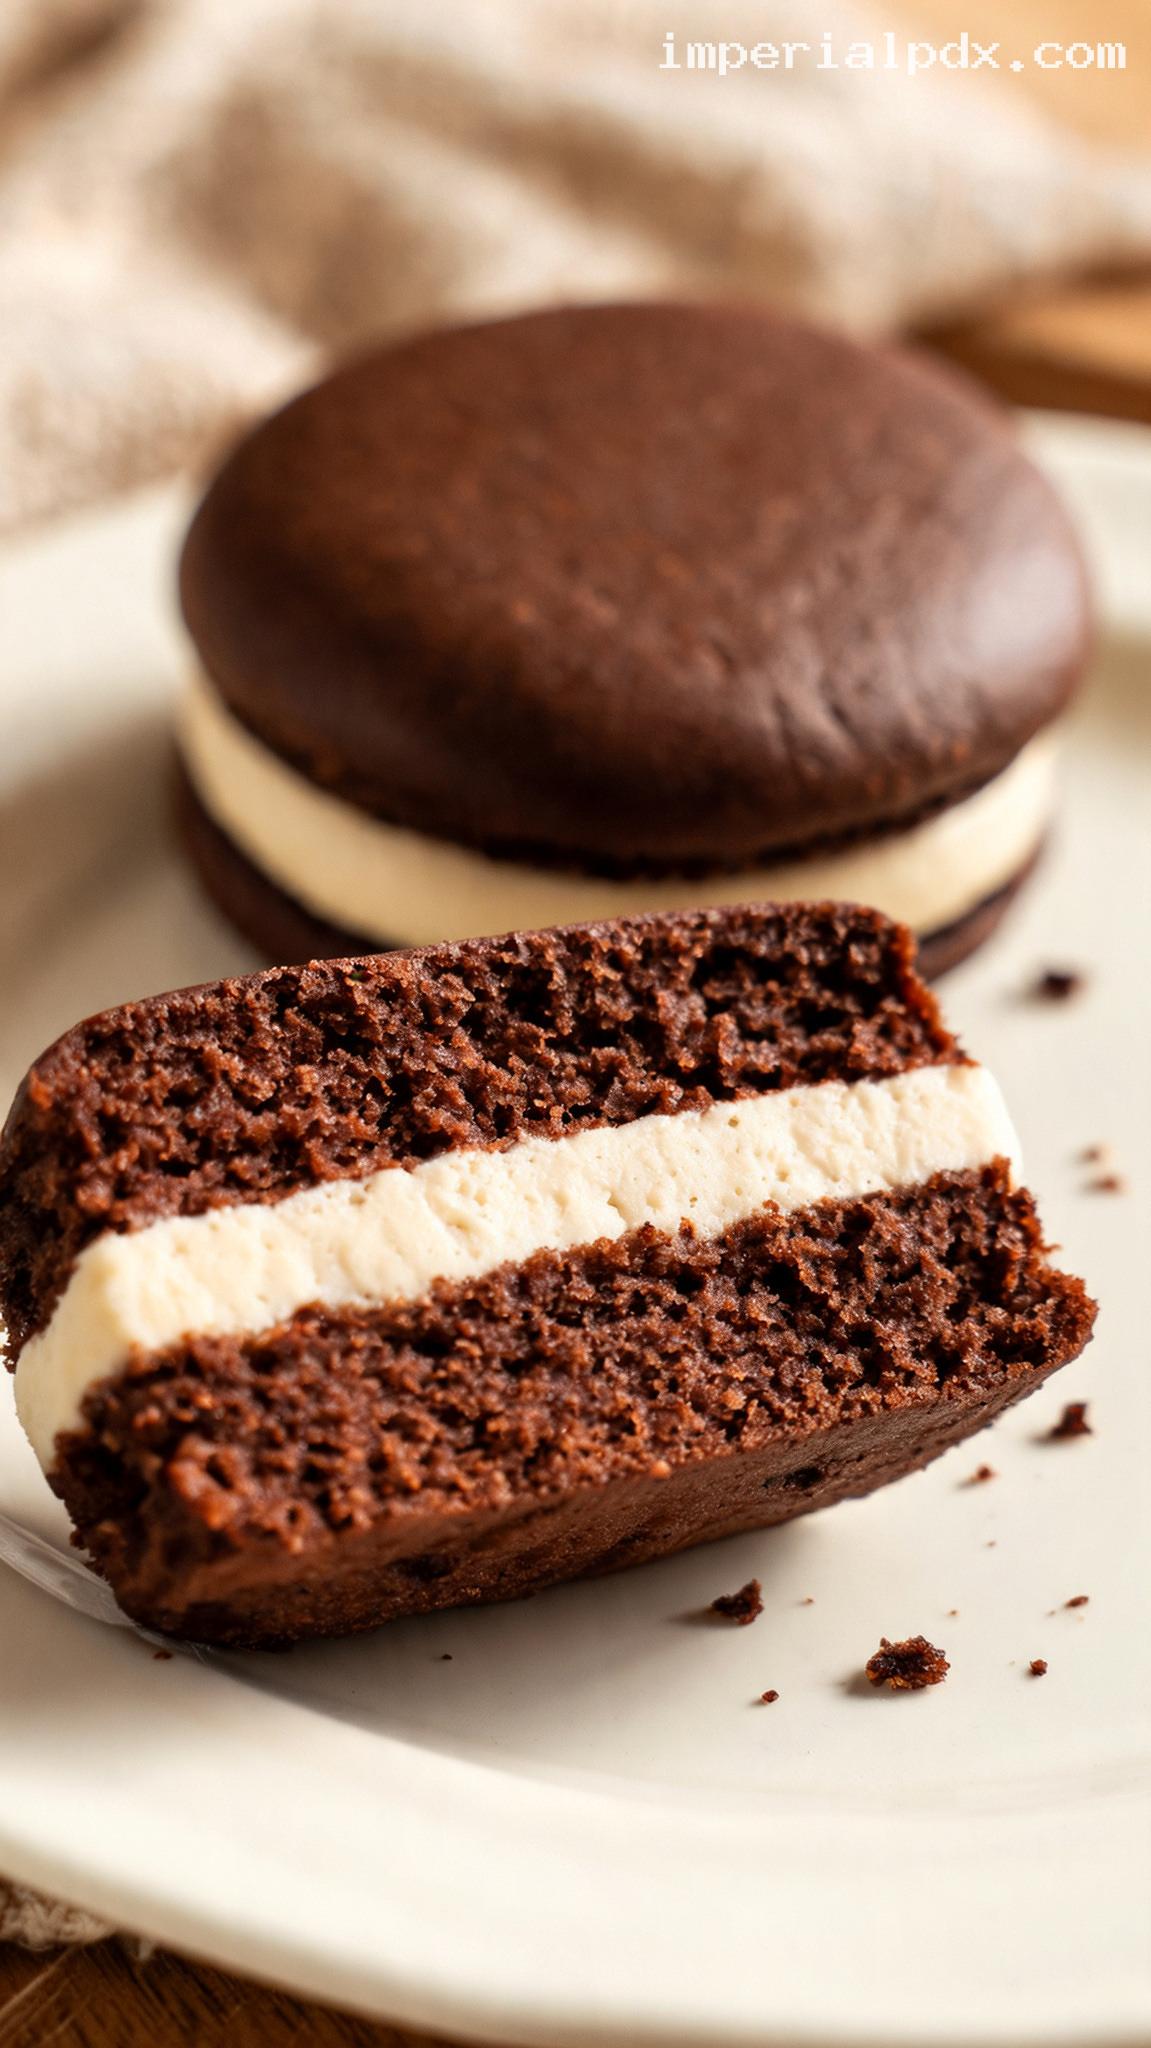
Classic Amish Whoopie Pies with Fluffy Vanilla Filling pair soft, dark chocolate cake rounds with a generous layer of old-fashioned cooked vanilla filling. The butter-and-shortening filling is wonderfully airy, smooth, and less sweet than a typical powdered-sugar frosting.
Quick Ingredients
- Chocolate cakes: 2 cups (240 g) all-purpose flour, 1/2 cup (45 g) natural unsweetened cocoa powder, 1 teaspoon baking soda, and 1/2 teaspoon fine salt.
- Chocolate cakes, continued: 1/2 cup (113 g) softened unsalted butter, 1 cup (200 g) granulated sugar, 1 large egg, 2 teaspoons vanilla extract, and 1 cup (240 ml) buttermilk.
- Vanilla filling base: 1 cup (240 ml) whole milk, 1/4 cup (32 g) all-purpose flour, 3/4 cup (150 g) granulated sugar, and 1/4 teaspoon fine salt.
- Vanilla filling, continued: 1/2 cup (113 g) softened unsalted butter, 1/2 cup (96 g) vegetable shortening, and 2 teaspoons vanilla extract.
Do This
- 1. Whisk the filling’s milk, flour, sugar, and salt in a saucepan. Cook over medium heat for approximately 6 minutes, whisking constantly, until thick; let it bubble gently for the final 1 minute. Transfer to a shallow bowl, cover the surface, and cool completely.
- 2. Heat the oven to 350°F (175°C). Line two large baking sheets with parchment. Whisk together the cake flour, cocoa, baking soda, and salt.
- 3. Beat the cake butter and sugar for 3 minutes. Beat in the egg and vanilla, then mix in the dry ingredients alternately with the buttermilk.
- 4. Divide the batter into 24 equal mounds on the baking sheets. Bake one sheet at a time for 12 minutes, until the tops spring back lightly.
- 5. Cool the rounds on their baking sheets for 5 minutes, then transfer to racks and cool completely.
- 6. Beat the filling butter and shortening for 4 minutes. Gradually beat in the cooled milk mixture, add the vanilla, and whip for 2 minutes more.
- 7. Match the rounds by size, divide the filling among 12 bottoms, and gently sandwich with the remaining rounds. Refrigerate until ready to serve.
Why You’ll Love This Recipe
- Soft, deeply chocolatey cakes: Buttermilk keeps the rounds tender, with a moist, almost brownie-like crumb rather than a crisp cookie texture.
- A fluffy, old-fashioned filling: A cooked milk-and-flour base creates a silky vanilla center without cups of powdered sugar.
- Generous but balanced: Each sandwich has a thick layer of filling, yet the airy texture keeps it from feeling overly heavy.
- Perfect for sharing: These nostalgic treats are easy to portion, wrap, and tuck into a chilled lunchbox or bring to a bake sale.
Grocery List
- Produce: None needed.
- Dairy: 1 cup (226 g) unsalted butter, 1 cup (240 ml) buttermilk, 1 cup (240 ml) whole milk, and 1 large egg.
- Pantry: All-purpose flour, natural unsweetened cocoa powder, granulated sugar, baking soda, fine salt, vegetable shortening, and vanilla extract.
Full Ingredients
For the Chocolate Cake Rounds
- 2 cups (240 g) all-purpose flour, spooned into the measuring cup and leveled
- 1/2 cup (45 g) natural unsweetened cocoa powder
- 1 teaspoon baking soda
- 1/2 teaspoon fine salt
- 1/2 cup (113 g) unsalted butter, softened but not melted
- 1 cup (200 g) granulated sugar
- 1 large egg, at room temperature
- 2 teaspoons (10 ml) vanilla extract
- 1 cup (240 ml) buttermilk, at room temperature
For the Fluffy Vanilla Filling
- 1 cup (240 ml) whole milk
- 1/4 cup (32 g) all-purpose flour
- 3/4 cup (150 g) granulated sugar
- 1/4 teaspoon fine salt
- 1/2 cup (113 g) unsalted butter, softened but still cool to the touch
- 1/2 cup (96 g) vegetable shortening, at room temperature
- 2 teaspoons (10 ml) vanilla extract
Helpful Equipment
- Two large rimmed baking sheets, approximately 13 × 18 inches
- Parchment paper, wire cooling racks, and a small saucepan
- A hand mixer or stand mixer fitted with the paddle attachment
- A cookie scoop or two spoons; a kitchen scale helps make evenly sized rounds
- An offset spatula or a piping bag fitted with a large round tip
Step-by-Step Instructions
Step 1: Cook and cool the vanilla filling base
In a small saucepan, whisk together 1 cup whole milk, 1/4 cup flour, 3/4 cup sugar, and 1/4 teaspoon salt while the mixture is still cold. Whisk until no dry flour pockets remain.
Place the saucepan over medium heat and cook, whisking constantly and scraping the bottom and corners, for approximately 6 minutes. Once the mixture starts bubbling gently, continue cooking and whisking for 1 minute. It should resemble thick pudding, with the whisk leaving visible trails. If it has not thickened and bubbled, continue cooking until it does; the texture matters more than the exact stovetop time.
Transfer the mixture to a wide, shallow bowl. Press plastic wrap directly against the surface to prevent a skin, then cool completely, approximately 30–40 minutes. It should be no warmer than room temperature before you add it to the butter. You can prepare and bake the cakes while it cools.
Step 2: Prepare the oven and dry ingredients
Preheat the oven to 350°F (175°C) with a rack in the center. Line two large baking sheets with parchment paper.
In a medium bowl, whisk together 2 cups flour, 1/2 cup cocoa powder, 1 teaspoon baking soda, and 1/2 teaspoon salt. Break up any cocoa lumps so the batter will mix evenly without excessive stirring.
Step 3: Mix the chocolate batter
In a large mixing bowl, beat 1/2 cup softened butter and 1 cup sugar on medium speed for 3 minutes, until lighter in color and fluffy. Scrape down the bowl, add the egg and 2 teaspoons vanilla, and beat for 1 minute.
With the mixer on low speed, add the dry ingredients in three additions, alternating with the buttermilk in two additions. Begin and end with the dry ingredients. Mix only until each addition is mostly incorporated, then finish with a few strokes of a spatula, checking the bottom of the bowl for unmixed flour.
The finished batter should be thick, soft, and scoopable—closer to a sturdy cake batter than a cookie dough. Do not add extra flour simply because it looks softer than cookie dough.
Step 4: Portion and bake the cake rounds
Divide the batter into 24 equal mounds, placing 12 on each prepared baking sheet. Each portion will weigh approximately 40–42 g. Leave about 2 inches between the unbaked mounds so they have room to spread. Use the back of a lightly dampened spoon to smooth any tall peaks without flattening the batter.
Bake one sheet at a time for 12 minutes, rotating the sheet front to back after 6 minutes if your oven browns unevenly. The rounds are ready when their tops look set and spring back gently when touched; a toothpick should come out with a few moist crumbs, not wet batter. Begin checking at 10 minutes, since smaller portions and darker baking sheets can bake faster.
Let the rounds rest on the baking sheet for 5 minutes, then carefully transfer them to a wire rack. Repeat with the second sheet. Allow the cakes to cool completely before filling, approximately 20–30 minutes after they leave the oven.
Step 5: Whip the fluffy vanilla filling
Check that the cooked milk mixture is completely cool and that the filling butter is soft but not greasy. Beat 1/2 cup butter and 1/2 cup vegetable shortening on medium-high speed for 4 minutes, scraping down the bowl halfway through. The mixture should look pale and fluffy.
Add the cooled milk mixture one heaping tablespoon at a time, beating on medium speed until each addition is incorporated. Scrape down the bowl as needed. Add 2 teaspoons vanilla, then beat on medium-high speed for 2 minutes, until the filling is smooth, light, and spreadable.
If the filling looks loose, refrigerate it for 10–15 minutes and beat again briefly. If it looks curdled because the ingredients were too cold, let it stand at room temperature for 10 minutes, then continue beating.
Step 6: Fill and sandwich the whoopie pies
Pair the cooled rounds by size and turn one round from each pair flat-side up. Divide the filling evenly among these 12 bottoms, using approximately 1/4 cup per sandwich. Spoon it on or pipe a thick spiral, leaving a small border around the edge.
Set the matching rounds on top, flat-side down, and press very gently until the filling reaches close to the edges. Aim for a generous layer approximately 1/2 inch thick rather than squeezing the filling out.
Step 7: Set, serve, or package
You can enjoy the whoopie pies immediately, but a 20-minute chill makes the filling firmer and the sandwiches easier to handle. For wrapping, chill them first, then package individually in parchment or food-safe bags so the soft cakes do not stick to the wrapping.
For the softest texture, take refrigerated whoopie pies out about 15–20 minutes before serving. Keep them chilled during transport, especially for lunchboxes and bake sales.
Pro Tips
- Use natural cocoa for this version: The recipe is developed with natural unsweetened cocoa and acidic buttermilk. Dutch-process and black cocoa can change both flavor and rise.
- Measure flour gently: A scale gives the most consistent results. If using cups, spoon the flour into the cup and level it rather than scooping directly from the bag.
- Do not overbake: These are soft little cakes, not crisp cookies. Remove them when just set to preserve their tender, moist centers.
- Cool everything before filling: Warm cakes or warm cooked filling will soften the butter and can make the sandwiches slide apart.
- Keep the filling ingredients at similar temperatures: Room-temperature cooked filling, softened butter, and room-temperature shortening combine more smoothly.
Variations
- Chocolate filling: Beat 2 tablespoons (10 g) sifted natural cocoa powder into the filling’s butter-and-shortening mixture before adding the cooked milk base. Keep the vanilla as written.
- Chocolate-mint whoopie pies: Use 1 teaspoon (5 ml) vanilla extract and 1/4 teaspoon (1.25 ml) peppermint extract in the filling instead of 2 teaspoons vanilla.
- Mini whoopie pies: Divide the batter into 48 portions of approximately 20–21 g each. Bake at 350°F (175°C) for 9 minutes, checking at 8 minutes. Sandwich into 24 mini pies, dividing the filling evenly.
Storage & Make-Ahead
Refrigerator: Store assembled whoopie pies in an airtight container in the refrigerator for up to 4 days. Separate layers with parchment, or wrap each sandwich after chilling. Because the filling contains cooked milk, limit time at room temperature to 2 hours, or 1 hour when the temperature is above 90°F (32°C).
Freezer: Freeze assembled pies on a parchment-lined tray until firm, approximately 1 hour. Wrap individually, place in a freezer-safe container, and freeze for up to 2 months. Thaw overnight in the refrigerator, then let stand for 15–20 minutes before serving.
Make ahead: Unfilled cake rounds can be stored airtight at room temperature for 2 days or frozen for 2 months. The finished filling can be refrigerated separately for 3 days; let it soften at room temperature for 20–30 minutes and briefly rewhip before using. If preparing the filling ahead, count its storage time toward the assembled pies’ refrigerator storage time.
Nutrition (per serving)
Calories: 440 kcal | Carbs: 51g | Protein: 5g | Fat: 25g | Saturated Fat: 12g | Fiber: 2g | Sugar: 31g | Sodium: 292mg | Cholesterol: 59mg
Estimated for 1 assembled whoopie pie, based on 12 servings. Actual values vary with ingredient brands and portion sizes.