Quick Recipe Version (TL;DR)
Quick Ingredients
- Chicken: 1 3/4 pounds boneless skinless chicken thighs, cut into 2-inch pieces
- Marinade: 3/4 cup buttermilk, 1 tablespoon low-sodium soy sauce, 1 teaspoon toasted sesame oil, 1 teaspoon garlic powder, 1/2 teaspoon kosher salt, 1/4 teaspoon black pepper
- Coating: 1 cup all-purpose flour, 3/4 cup cornstarch, 1 teaspoon baking powder, 1 teaspoon kosher salt, 1 teaspoon garlic powder, 1/2 teaspoon ground ginger, 1/2 teaspoon white pepper, 1/4 teaspoon cayenne pepper
- Frying: 6 cups neutral oil, or enough for 2 inches in a Dutch oven
- Hoisin glaze: 1/2 cup hoisin sauce, 2 tablespoons honey, 2 tablespoons low-sodium soy sauce, 2 tablespoons rice vinegar, 1 tablespoon toasted sesame oil, 1 tablespoon water, 3 minced garlic cloves, 2 teaspoons grated fresh ginger, 1 teaspoon sriracha, 1 teaspoon cornstarch mixed with 1 tablespoon water
- Garnish: 2 teaspoons toasted sesame seeds and 2 thinly sliced green onions
Do This
- 1. Marinate chicken in buttermilk, soy sauce, sesame oil, garlic powder, salt, and pepper for 30 minutes.
- 2. Simmer hoisin glaze ingredients, add cornstarch slurry, and cook until glossy, 1 to 2 minutes.
- 3. Mix the dry coating; drizzle in 2 tablespoons marinade to make craggy bits.
- 4. Dredge chicken thoroughly and rest on a rack for 10 minutes.
- 5. Fry in batches at 350°F for about 5 minutes, then drain on a rack.
- 6. Fry a second time at 375°F for 1 to 2 minutes, until deeply crisp and 165°F inside.
- 7. Toss with warm hoisin glaze, garnish with sesame seeds and green onions, and serve right away.
Why You’ll Love This Recipe
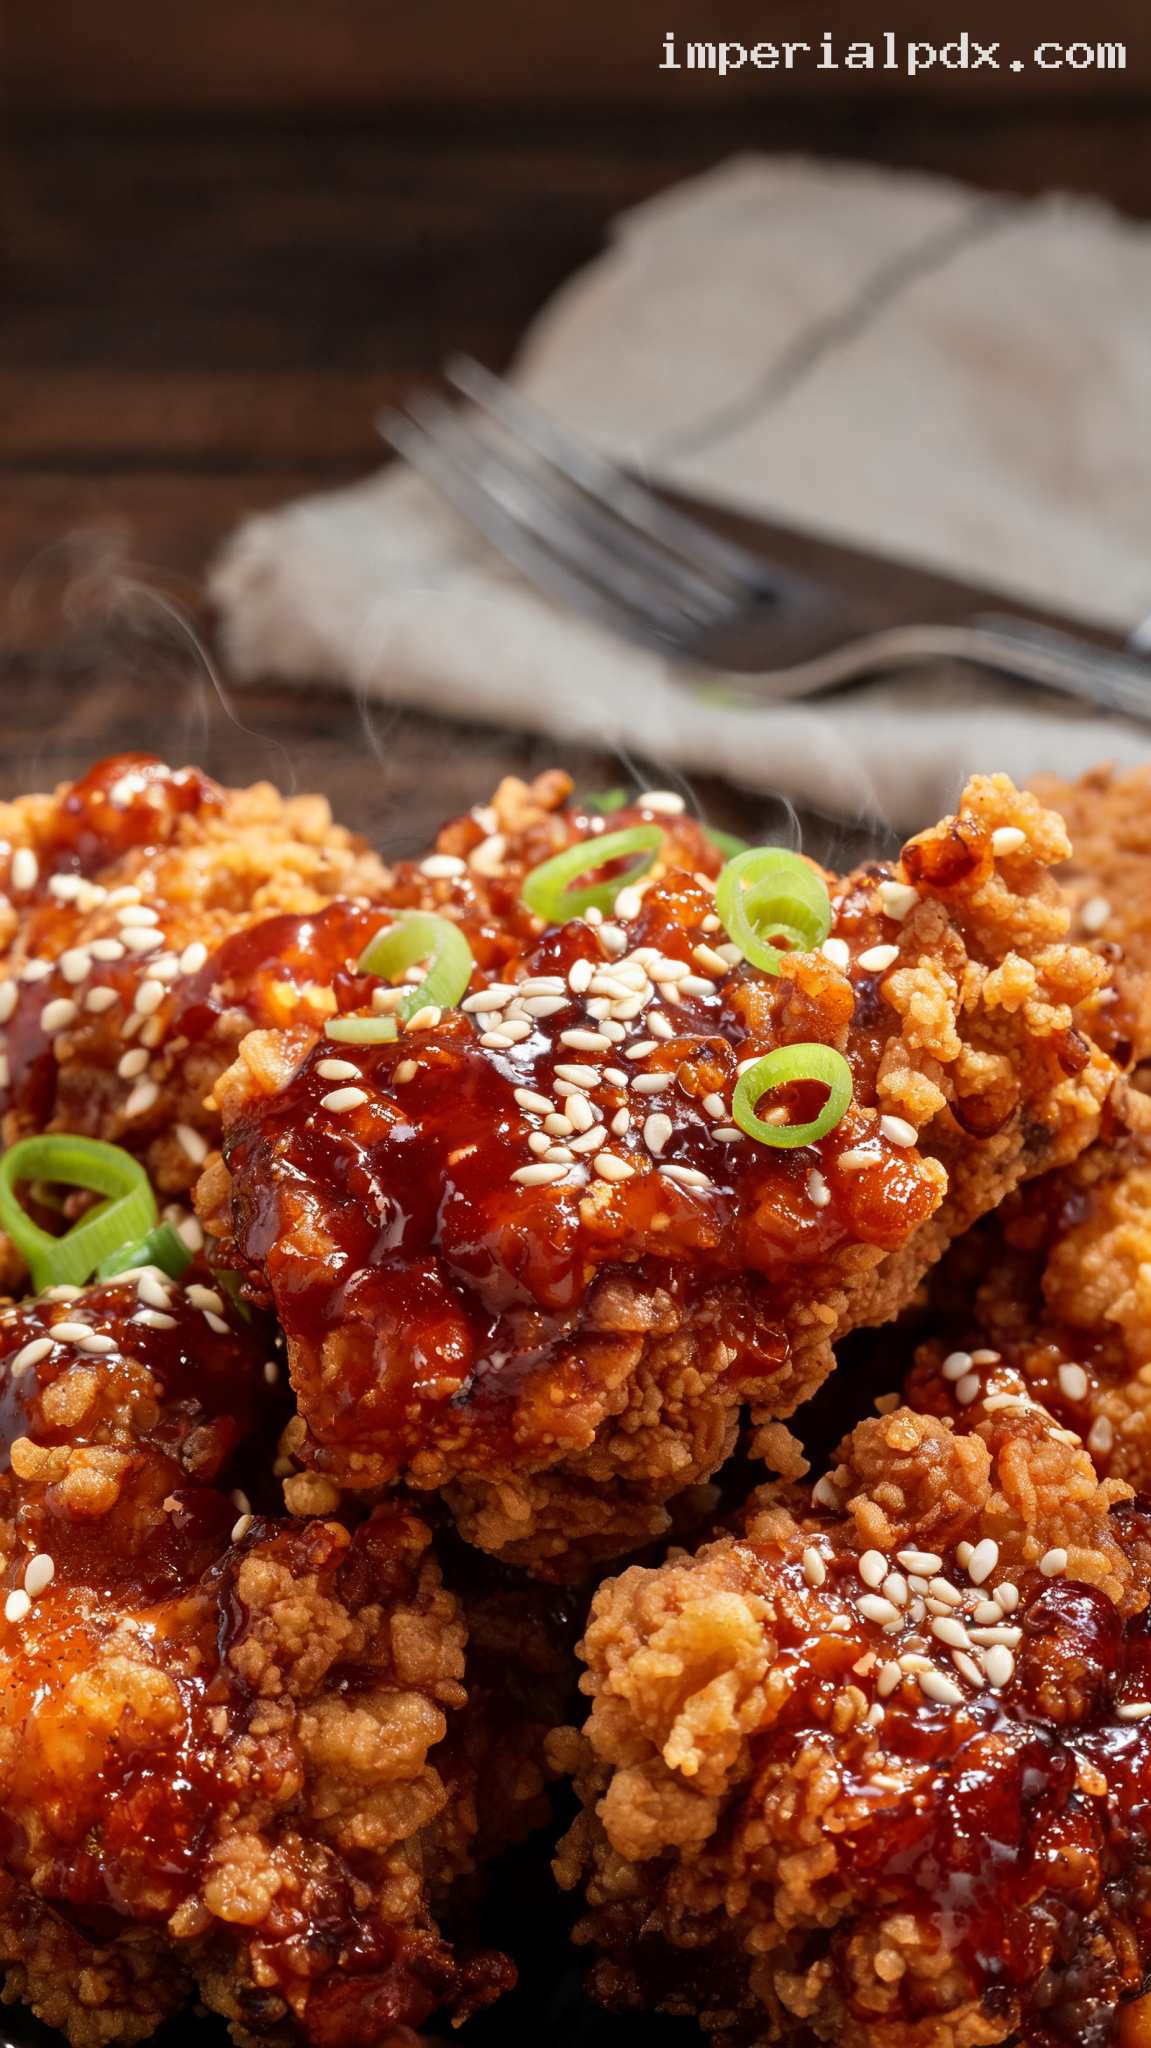
- Big crunch, glossy finish: A cornstarch-flour coating fries up shatteringly crisp, then gets coated in a sticky, shiny hoisin glaze.
- Sweet-savory balance: Hoisin, soy sauce, rice vinegar, garlic, ginger, sesame oil, and honey create a sauce that tastes rich without feeling heavy.
- Home-cook friendly: Boneless chicken thighs cook quickly, stay juicy, and are easier to handle than bone-in pieces.
- Restaurant-style results: Double frying gives the chicken extra crunch so it can hold up to the glaze beautifully.
Grocery List
- Meat: 1 3/4 pounds boneless skinless chicken thighs
- Produce: Fresh garlic, fresh ginger, green onions
- Dairy: Buttermilk
- Pantry: Hoisin sauce, low-sodium soy sauce, toasted sesame oil, rice vinegar, honey, sriracha, all-purpose flour, cornstarch, baking powder, kosher salt, black pepper, white pepper, garlic powder, ground ginger, cayenne pepper, neutral frying oil, toasted sesame seeds
Full Ingredients
For the Chicken and Marinade
- 1 3/4 pounds boneless skinless chicken thighs, trimmed and cut into 2-inch pieces
- 3/4 cup buttermilk
- 1 tablespoon low-sodium soy sauce
- 1 teaspoon toasted sesame oil
- 1 teaspoon garlic powder
- 1/2 teaspoon kosher salt
- 1/4 teaspoon freshly ground black pepper
For the Crunchy Coating
- 1 cup all-purpose flour
- 3/4 cup cornstarch
- 1 teaspoon baking powder
- 1 teaspoon kosher salt
- 1 teaspoon garlic powder
- 1/2 teaspoon ground ginger
- 1/2 teaspoon ground white pepper
- 1/4 teaspoon cayenne pepper, optional but recommended
- 2 tablespoons chicken marinade, for creating craggy coating bits
For Frying
- 6 cups neutral oil, such as canola, vegetable, peanut, or sunflower oil, or enough to fill a heavy pot with 2 inches of oil
For the Hoisin Garlic-Ginger Glaze
- 1/2 cup hoisin sauce
- 2 tablespoons honey
- 2 tablespoons low-sodium soy sauce
- 2 tablespoons rice vinegar
- 1 tablespoon toasted sesame oil
- 1 tablespoon water
- 3 garlic cloves, finely minced
- 2 teaspoons freshly grated ginger
- 1 teaspoon sriracha or chili-garlic sauce, optional
- 1 teaspoon cornstarch mixed with 1 tablespoon cold water
For Serving
- 2 teaspoons toasted sesame seeds
- 2 green onions, thinly sliced
- Steamed jasmine rice, optional
- Thin cucumber slices or quick pickled vegetables, optional
Step-by-Step Instructions
Step 1: Marinate the chicken
Pat the chicken thighs dry with paper towels, then cut them into 2-inch pieces. In a medium bowl, whisk together the buttermilk, low-sodium soy sauce, toasted sesame oil, garlic powder, kosher salt, and black pepper. Add the chicken and stir until every piece is coated. Cover and refrigerate for 30 minutes.
If you have extra time, you can marinate the chicken for up to 8 hours in the refrigerator. Do not marinate longer than 12 hours, as the buttermilk can begin to soften the texture too much.
Step 2: Make the hoisin garlic-ginger glaze
In a small saucepan, combine the hoisin sauce, honey, low-sodium soy sauce, rice vinegar, toasted sesame oil, water, minced garlic, grated ginger, and sriracha, if using. Set the pan over medium heat and bring the mixture to a gentle simmer, stirring often.
Once the glaze is bubbling lightly, stir in the cornstarch and water slurry. Cook for 1 to 2 minutes, stirring constantly, until the sauce looks glossy and lightly thickened. Remove from the heat and set aside. The glaze should be pourable but thick enough to coat the back of a spoon.
Step 3: Mix the crunchy coating and heat the oil
In a wide shallow bowl, whisk together the all-purpose flour, cornstarch, baking powder, kosher salt, garlic powder, ground ginger, white pepper, and cayenne pepper. Drizzle 2 tablespoons of the chicken marinade into the dry mixture and rub it in with your fingertips until small clumps form. These little clumps create extra-craggy, crunchy edges when fried.
Pour 6 cups neutral oil into a large Dutch oven or heavy-bottomed pot, making sure the oil is no more than halfway up the sides. Heat the oil over medium-high heat to 350°F. Use a deep-fry or candy thermometer for the most reliable results.
Step 4: Dredge the chicken
Remove the chicken from the marinade one piece at a time, letting excess marinade drip back into the bowl. Add the chicken to the flour-cornstarch coating and press firmly so the coating adheres on all sides. Place the coated pieces on a wire rack set over a sheet pan.
Let the coated chicken rest for 10 minutes before frying. This short rest helps the coating hydrate and stick to the chicken, which means less coating falls off in the oil.
Step 5: First fry until lightly golden
When the oil reaches 350°F, carefully lower a few pieces of chicken into the pot. Fry in batches so the pieces have space and the oil temperature does not drop too much. Cook each batch for about 5 minutes, turning occasionally, until the chicken is pale golden and mostly cooked through.
Transfer the fried chicken to a clean wire rack set over a sheet pan. Let the oil return to 350°F between batches. The chicken should be at least 155°F internally after the first fry; it will finish cooking during the second fry.
Step 6: Second fry for maximum crunch
Increase the oil temperature to 375°F. Return the chicken to the oil in batches and fry for 1 to 2 minutes, until deeply golden brown, extra crisp, and cooked to an internal temperature of 165°F. Transfer the chicken back to the wire rack to drain for 2 minutes.
A wire rack is better than paper towels here because it allows steam to escape, keeping the coating crisp instead of soggy.
Step 7: Glaze and serve
Warm the hoisin glaze over low heat for 1 to 2 minutes if it has thickened while sitting. Place the hot fried chicken in a large mixing bowl, drizzle with about three-quarters of the warm glaze, and toss gently until coated. Add more glaze as desired, keeping in mind that a lighter coating preserves more crunch.
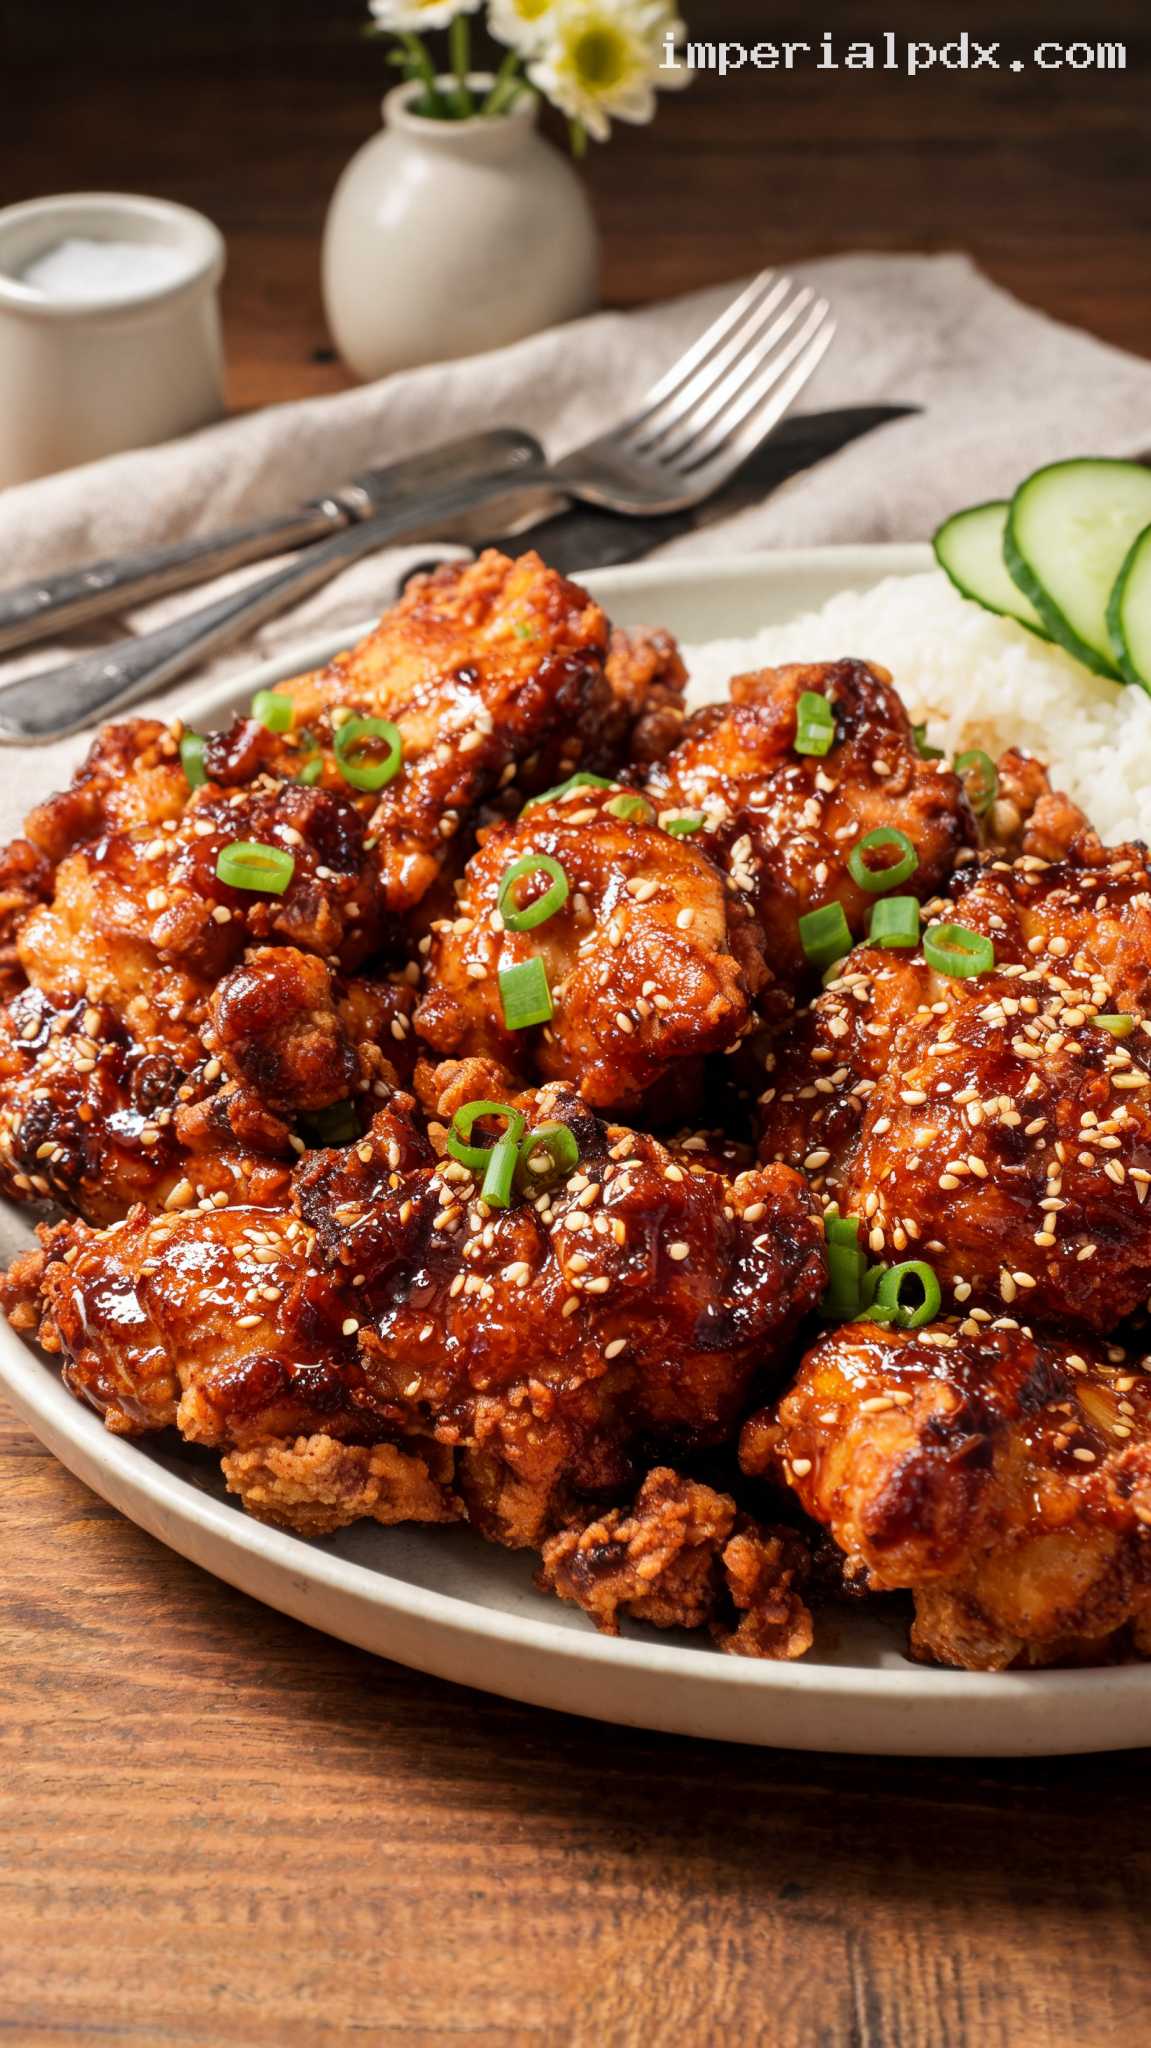
Transfer the chicken to a serving platter and sprinkle with toasted sesame seeds and sliced green onions. Serve immediately while the coating is still crisp and the glaze is shiny. This chicken is excellent with steamed jasmine rice, cucumber slices, or quick pickled vegetables.
Pro Tips
- Use a thermometer for the oil: Frying at the right temperature is the key to crisp chicken. Too low and the coating absorbs oil; too high and the outside browns before the inside cooks.
- Do not skip the resting rack: Resting the dredged chicken for 10 minutes helps the coating bond to the meat, and draining fried chicken on a rack keeps it crunchy.
- Glaze right before serving: The hoisin sauce is wonderfully sticky, but any sauce will soften fried coating over time. Toss just before eating for the best texture.
- Keep batches small: Overcrowding drops the oil temperature and can make the chicken greasy. Fry in 3 to 4 batches if needed.
- Adjust the glaze to taste: Add an extra teaspoon of rice vinegar for more brightness, or an extra teaspoon of honey for a sweeter, stickier finish.
Variations
- Spicy hoisin fried chicken: Increase the sriracha to 1 tablespoon and add 1/2 teaspoon crushed red pepper flakes to the glaze.
- Hoisin orange glazed chicken: Replace the 1 tablespoon water in the glaze with 1 tablespoon fresh orange juice and add 1 teaspoon finely grated orange zest.
- Air fryer shortcut: Coat the marinated chicken as directed, spray generously with oil, and air fry at 400°F for 14 to 18 minutes, flipping halfway, until 165°F inside. The crust will be lighter than deep-fried chicken but still tasty. Toss with warm glaze just before serving.
Storage & Make-Ahead
This chicken is best eaten right after glazing, when the coating is crisp and the sauce is glossy. Store leftovers in an airtight container in the refrigerator for up to 3 days. To reheat, place the chicken on a wire rack set over a baking sheet and warm in a 375°F oven for 10 to 14 minutes, or until heated through. The glaze will become less crisp after storage, but the flavor will still be delicious.
For make-ahead prep, mix the glaze up to 4 days in advance and refrigerate it in a covered container. Rewarm gently on the stovetop before using. You can also cut the chicken and whisk together the dry coating 1 day ahead. Marinate the chicken the day you plan to cook it for the best texture.
Nutrition (per serving)
Calories: 645 kcal | Carbs: 57g | Protein: 34g | Fat: 32g | Saturated Fat: 6g | Fiber: 2g | Sugar: 18g | Sodium: 1240mg | Cholesterol: 145mg